[{
"id": 10646105719089,
"title": "National Association of Rocketry Mission Inspiration Tee (Youth)",
"handle": "nar-inspiration-tee-youth",
"vendor": "National Association of Rocketry",
"tags": ["Discount Eligible",
"published"
],
"price": 3499,
"price_max": 3499,
"price_min": 3499,
"compare_at_price": 3499,
"available": true,
"price_varies": false,
"compare_at_price_varies": false,
"url": "\/products\/nar-inspiration-tee-youth",
"has_only_default_variant": false,
"variants": [{
"id": 53677520617777,
"title": "Small",
"option1": "Small",
"option2": null,
"option3": null,
"sku": "020002-SML",
"requires_shipping": true,
"taxable": true,
"featured_image": null,
"available": true,
"price": 3499,
"compare_at_price": 3499,
"weight": 0,
"weight_unit": "lb",
"inventory_quantity": 15,
"inventory_management": "shopify",
"inventory_policy": "deny",
"barcode": null
},
{
"id": 53677520650545,
"title": "Medium",
"option1": "Medium",
"option2": null,
"option3": null,
"sku": "020002-MED",
"requires_shipping": true,
"taxable": true,
"featured_image": null,
"available": true,
"price": 3499,
"compare_at_price": 3499,
"weight": 0,
"weight_unit": "lb",
"inventory_quantity": 30,
"inventory_management": "shopify",
"inventory_policy": "deny",
"barcode": null
},
{
"id": 53677520683313,
"title": "Large",
"option1": "Large",
"option2": null,
"option3": null,
"sku": "020002-LRG",
"requires_shipping": true,
"taxable": true,
"featured_image": null,
"available": true,
"price": 3499,
"compare_at_price": 3499,
"weight": 0,
"weight_unit": "lb",
"inventory_quantity": 40,
"inventory_management": "shopify",
"inventory_policy": "deny",
"barcode": null
},
{
"id": 53677520716081,
"title": "X-Large",
"option1": "X-Large",
"option2": null,
"option3": null,
"sku": "020002-XLRG",
"requires_shipping": true,
"taxable": true,
"featured_image": null,
"available": true,
"price": 3499,
"compare_at_price": 3499,
"weight": 0,
"weight_unit": "lb",
"inventory_quantity": 15,
"inventory_management": "shopify",
"inventory_policy": "deny",
"barcode": null
}
],
"selected_or_first_available_variant": {
"id": 53677520617777,
"title": "Small",
"price": 3499,
"compare_at_price": 3499,
"price_money": "$34.99",
"compare_at_price_money": "$34.99",
"available": true,
"sku": "020002-SML",
"weight": 0,
"featured_image": null
},
"images": [{
"id": 57542424690993,
"product_id": 10646105719089,
"position": 1,
"created_at": null,
"updated_at": null,
"alt": "National Association of Rocketry Mission Inspiration Tee (Youth)",
"src": "\/\/estesrockets.com\/cdn\/shop\/files\/National-Association-of-Rocketry-Youth-T-Shirt-Front.png?v=1775683044",
"variant_ids": []
},
{
"id": 57542424756529,
"product_id": 10646105719089,
"position": 2,
"created_at": null,
"updated_at": null,
"alt": "Youth T-Shirt - National Association of Rocketry - Mission Inspiration",
"src": "\/\/estesrockets.com\/cdn\/shop\/files\/National-Association-of-Rocketry-Youth-T-Shirt-Logo.jpg?v=1775683044",
"variant_ids": []
},
{
"id": 59045363679537,
"product_id": 10646105719089,
"position": 3,
"created_at": null,
"updated_at": null,
"alt": "National Association of Rocketry (NAR) Mission Inspiration Youth T-Shirt ",
"src": "\/\/estesrockets.com\/cdn\/shop\/files\/National-Association-of-Rocketry-Youth-T-Shirt-Lifestyle-v3.png?v=1784322828",
"variant_ids": []
}
],
"featured_image": "\/\/estesrockets.com\/cdn\/shop\/files\/National-Association-of-Rocketry-Youth-T-Shirt-Front.png?v=1775683044",
"featured_media": {
"id": 47260481028401,
"position": 1,
"preview_image": "\/\/estesrockets.com\/cdn\/shop\/files\/National-Association-of-Rocketry-Youth-T-Shirt-Front.png?v=1775683044",
"aspect_ratio": 1.0,
"media_type": "image",
"src": {"alt":"National Association of Rocketry Mission Inspiration Tee (Youth)","id":47260481028401,"position":1,"preview_image":{"aspect_ratio":1.0,"height":1000,"width":1000,"src":"\/\/estesrockets.com\/cdn\/shop\/files\/National-Association-of-Rocketry-Youth-T-Shirt-Front.png?v=1775683044"},"aspect_ratio":1.0,"height":1000,"media_type":"image","src":"\/\/estesrockets.com\/cdn\/shop\/files\/National-Association-of-Rocketry-Youth-T-Shirt-Front.png?v=1775683044","width":1000}
},
"first_available_variant": {"id":53677520617777,"title":"Small","option1":"Small","option2":null,"option3":null,"sku":"020002-SML","requires_shipping":true,"taxable":true,"featured_image":null,"available":true,"name":"National Association of Rocketry Mission Inspiration Tee (Youth) - Small","public_title":"Small","options":["Small"],"price":3499,"weight":0,"compare_at_price":3499,"inventory_management":"shopify","barcode":null,"requires_selling_plan":false,"selling_plan_allocations":[],"quantity_rule":{"min":1,"max":null,"increment":1}},
"media": [{
"id": 47260481028401,
"position": 1,
"preview_image": "\/\/estesrockets.com\/cdn\/shop\/files\/National-Association-of-Rocketry-Youth-T-Shirt-Front.png?v=1775683044",
"aspect_ratio": 1.0,
"media_type": "image",
"src": {"alt":"National Association of Rocketry Mission Inspiration Tee (Youth)","id":47260481028401,"position":1,"preview_image":{"aspect_ratio":1.0,"height":1000,"width":1000,"src":"\/\/estesrockets.com\/cdn\/shop\/files\/National-Association-of-Rocketry-Youth-T-Shirt-Front.png?v=1775683044"},"aspect_ratio":1.0,"height":1000,"media_type":"image","src":"\/\/estesrockets.com\/cdn\/shop\/files\/National-Association-of-Rocketry-Youth-T-Shirt-Front.png?v=1775683044","width":1000}
},
{
"id": 47260481093937,
"position": 2,
"preview_image": "\/\/estesrockets.com\/cdn\/shop\/files\/National-Association-of-Rocketry-Youth-T-Shirt-Logo.jpg?v=1775683044",
"aspect_ratio": 1.0,
"media_type": "image",
"src": {"alt":"Youth T-Shirt - National Association of Rocketry - Mission Inspiration","id":47260481093937,"position":2,"preview_image":{"aspect_ratio":1.0,"height":1000,"width":1000,"src":"\/\/estesrockets.com\/cdn\/shop\/files\/National-Association-of-Rocketry-Youth-T-Shirt-Logo.jpg?v=1775683044"},"aspect_ratio":1.0,"height":1000,"media_type":"image","src":"\/\/estesrockets.com\/cdn\/shop\/files\/National-Association-of-Rocketry-Youth-T-Shirt-Logo.jpg?v=1775683044","width":1000}
},
{
"id": 48683972854065,
"position": 3,
"preview_image": "\/\/estesrockets.com\/cdn\/shop\/files\/National-Association-of-Rocketry-Youth-T-Shirt-Lifestyle-v3.png?v=1784322828",
"aspect_ratio": 1.0,
"media_type": "image",
"src": {"alt":"National Association of Rocketry (NAR) Mission Inspiration Youth T-Shirt ","id":48683972854065,"position":3,"preview_image":{"aspect_ratio":1.0,"height":1000,"width":1000,"src":"\/\/estesrockets.com\/cdn\/shop\/files\/National-Association-of-Rocketry-Youth-T-Shirt-Lifestyle-v3.png?v=1784322828"},"aspect_ratio":1.0,"height":1000,"media_type":"image","src":"\/\/estesrockets.com\/cdn\/shop\/files\/National-Association-of-Rocketry-Youth-T-Shirt-Lifestyle-v3.png?v=1784322828","width":1000}
}
],
"options": ["Size"
],
"options_with_values": [{
"name": "Size",
"position": 1,
"values": ["Small",
"Medium",
"Large",
"X-Large"
]
}
]
},
{
"id": 10650819887409,
"title": "Pro Series II™ Pink Flamingo™",
"handle": "pink-flamingo",
"vendor": "Estes Rockets",
"tags": ["Discount Eligible",
"published",
"Rocket"
],
"price": 6999,
"price_max": 6999,
"price_min": 6999,
"compare_at_price": 6999,
"available": true,
"price_varies": false,
"compare_at_price_varies": false,
"url": "\/products\/pink-flamingo",
"has_only_default_variant": true,
"variants": [{
"id": 53800399700273,
"title": "Default Title",
"option1": "Default Title",
"option2": null,
"option3": null,
"sku": "009736",
"requires_shipping": true,
"taxable": true,
"featured_image": null,
"available": true,
"price": 6999,
"compare_at_price": 6999,
"weight": 737,
"weight_unit": "oz",
"inventory_quantity": 694,
"inventory_management": "shopify",
"inventory_policy": "deny",
"barcode": "047776097360"
}
],
"selected_or_first_available_variant": {
"id": 53800399700273,
"title": "Default Title",
"price": 6999,
"compare_at_price": 6999,
"price_money": "$69.99",
"compare_at_price_money": "$69.99",
"available": true,
"sku": "009736",
"weight": 737,
"featured_image": null
},
"images": [{
"id": 58650385219889,
"product_id": 10650819887409,
"position": 1,
"created_at": null,
"updated_at": null,
"alt": "Estes Pro Series II Pink Flamingo Flying Model Rocket Kit",
"src": "\/\/estesrockets.com\/cdn\/shop\/files\/9736-Estes-Pink-Flamingo-Model-Rocket-Kit-shadow.png?v=1782235542",
"variant_ids": []
},
{
"id": 57627521089841,
"product_id": 10650819887409,
"position": 2,
"created_at": null,
"updated_at": null,
"alt": "Estes Pink Flamingo Flying Model Rocket",
"src": "\/\/estesrockets.com\/cdn\/shop\/files\/9736-Estes-Pink-Flamingo-Flying-Model-Rocket.png?v=1776201914",
"variant_ids": []
},
{
"id": 57627520991537,
"product_id": 10650819887409,
"position": 3,
"created_at": null,
"updated_at": null,
"alt": "Estes Pink Flamingo Flying Model Rocket with Parachute Recovery ",
"src": "\/\/estesrockets.com\/cdn\/shop\/files\/9736-Estes-Pink-Flamingo-Model-Rocket-Parachute-Recovery.png?v=1776201914",
"variant_ids": []
},
{
"id": 58996348125489,
"product_id": 10650819887409,
"position": 4,
"created_at": null,
"updated_at": null,
"alt": "Pro Series II Pink Flamingo Rocket - 3 Recommended Engine Configurations",
"src": "\/\/estesrockets.com\/cdn\/shop\/files\/pink-flamingo-rocket-engine-configurations.png?v=1784051328",
"variant_ids": []
},
{
"id": 57627521057073,
"product_id": 10650819887409,
"position": 5,
"created_at": null,
"updated_at": null,
"alt": "Estes Pro Series II Beginner Model Rocket Kit - Pink Flamingo ",
"src": "\/\/estesrockets.com\/cdn\/shop\/files\/9736-Estes-Pink-Flamingo-Model-Rocket-Upright.png?v=1776201914",
"variant_ids": []
},
{
"id": 57627520958769,
"product_id": 10650819887409,
"position": 6,
"created_at": null,
"updated_at": null,
"alt": "Estes Pro Series II Pink Flamingo Beginner Model Rocket",
"src": "\/\/estesrockets.com\/cdn\/shop\/files\/9736-Estes-Pink-Flamingo-Model-Rocket-Angled.png?v=1776201914",
"variant_ids": []
}
],
"featured_image": "\/\/estesrockets.com\/cdn\/shop\/files\/9736-Estes-Pink-Flamingo-Model-Rocket-Kit-shadow.png?v=1782235542",
"featured_media": {
"id": 48300508479793,
"position": 1,
"preview_image": "\/\/estesrockets.com\/cdn\/shop\/files\/9736-Estes-Pink-Flamingo-Model-Rocket-Kit-shadow.png?v=1782235542",
"aspect_ratio": 1.0,
"media_type": "image",
"src": {"alt":"Estes Pro Series II Pink Flamingo Flying Model Rocket Kit","id":48300508479793,"position":1,"preview_image":{"aspect_ratio":1.0,"height":1000,"width":1000,"src":"\/\/estesrockets.com\/cdn\/shop\/files\/9736-Estes-Pink-Flamingo-Model-Rocket-Kit-shadow.png?v=1782235542"},"aspect_ratio":1.0,"height":1000,"media_type":"image","src":"\/\/estesrockets.com\/cdn\/shop\/files\/9736-Estes-Pink-Flamingo-Model-Rocket-Kit-shadow.png?v=1782235542","width":1000}
},
"first_available_variant": {"id":53800399700273,"title":"Default Title","option1":"Default Title","option2":null,"option3":null,"sku":"009736","requires_shipping":true,"taxable":true,"featured_image":null,"available":true,"name":"Pro Series II™ Pink Flamingo™","public_title":null,"options":["Default Title"],"price":6999,"weight":737,"compare_at_price":6999,"inventory_management":"shopify","barcode":"047776097360","requires_selling_plan":false,"selling_plan_allocations":[],"quantity_rule":{"min":1,"max":null,"increment":1}},
"media": [{
"id": 48300508479793,
"position": 1,
"preview_image": "\/\/estesrockets.com\/cdn\/shop\/files\/9736-Estes-Pink-Flamingo-Model-Rocket-Kit-shadow.png?v=1782235542",
"aspect_ratio": 1.0,
"media_type": "image",
"src": {"alt":"Estes Pro Series II Pink Flamingo Flying Model Rocket Kit","id":48300508479793,"position":1,"preview_image":{"aspect_ratio":1.0,"height":1000,"width":1000,"src":"\/\/estesrockets.com\/cdn\/shop\/files\/9736-Estes-Pink-Flamingo-Model-Rocket-Kit-shadow.png?v=1782235542"},"aspect_ratio":1.0,"height":1000,"media_type":"image","src":"\/\/estesrockets.com\/cdn\/shop\/files\/9736-Estes-Pink-Flamingo-Model-Rocket-Kit-shadow.png?v=1782235542","width":1000}
},
{
"id": 47339984355633,
"position": 2,
"preview_image": "\/\/estesrockets.com\/cdn\/shop\/files\/9736-Estes-Pink-Flamingo-Flying-Model-Rocket.png?v=1776201914",
"aspect_ratio": 1.0,
"media_type": "image",
"src": {"alt":"Estes Pink Flamingo Flying Model Rocket","id":47339984355633,"position":2,"preview_image":{"aspect_ratio":1.0,"height":1000,"width":1000,"src":"\/\/estesrockets.com\/cdn\/shop\/files\/9736-Estes-Pink-Flamingo-Flying-Model-Rocket.png?v=1776201914"},"aspect_ratio":1.0,"height":1000,"media_type":"image","src":"\/\/estesrockets.com\/cdn\/shop\/files\/9736-Estes-Pink-Flamingo-Flying-Model-Rocket.png?v=1776201914","width":1000}
},
{
"id": 47339984257329,
"position": 3,
"preview_image": "\/\/estesrockets.com\/cdn\/shop\/files\/9736-Estes-Pink-Flamingo-Model-Rocket-Parachute-Recovery.png?v=1776201914",
"aspect_ratio": 1.0,
"media_type": "image",
"src": {"alt":"Estes Pink Flamingo Flying Model Rocket with Parachute Recovery ","id":47339984257329,"position":3,"preview_image":{"aspect_ratio":1.0,"height":1000,"width":1000,"src":"\/\/estesrockets.com\/cdn\/shop\/files\/9736-Estes-Pink-Flamingo-Model-Rocket-Parachute-Recovery.png?v=1776201914"},"aspect_ratio":1.0,"height":1000,"media_type":"image","src":"\/\/estesrockets.com\/cdn\/shop\/files\/9736-Estes-Pink-Flamingo-Model-Rocket-Parachute-Recovery.png?v=1776201914","width":1000}
},
{
"id": 48623665119537,
"position": 4,
"preview_image": "\/\/estesrockets.com\/cdn\/shop\/files\/preview_images\/pink-flamingo-hype-reel-thumbnail.png?v=1784135018",
"aspect_ratio": 1.775,
"media_type": "video",
"src": null
},
{
"id": 48636267135281,
"position": 5,
"preview_image": "\/\/estesrockets.com\/cdn\/shop\/files\/pink-flamingo-rocket-engine-configurations.png?v=1784051328",
"aspect_ratio": 1.0,
"media_type": "image",
"src": {"alt":"Pro Series II Pink Flamingo Rocket - 3 Recommended Engine Configurations","id":48636267135281,"position":5,"preview_image":{"aspect_ratio":1.0,"height":1000,"width":1000,"src":"\/\/estesrockets.com\/cdn\/shop\/files\/pink-flamingo-rocket-engine-configurations.png?v=1784051328"},"aspect_ratio":1.0,"height":1000,"media_type":"image","src":"\/\/estesrockets.com\/cdn\/shop\/files\/pink-flamingo-rocket-engine-configurations.png?v=1784051328","width":1000}
},
{
"id": 47339984322865,
"position": 6,
"preview_image": "\/\/estesrockets.com\/cdn\/shop\/files\/9736-Estes-Pink-Flamingo-Model-Rocket-Upright.png?v=1776201914",
"aspect_ratio": 1.0,
"media_type": "image",
"src": {"alt":"Estes Pro Series II Beginner Model Rocket Kit - Pink Flamingo ","id":47339984322865,"position":6,"preview_image":{"aspect_ratio":1.0,"height":1000,"width":1000,"src":"\/\/estesrockets.com\/cdn\/shop\/files\/9736-Estes-Pink-Flamingo-Model-Rocket-Upright.png?v=1776201914"},"aspect_ratio":1.0,"height":1000,"media_type":"image","src":"\/\/estesrockets.com\/cdn\/shop\/files\/9736-Estes-Pink-Flamingo-Model-Rocket-Upright.png?v=1776201914","width":1000}
},
{
"id": 47339984224561,
"position": 7,
"preview_image": "\/\/estesrockets.com\/cdn\/shop\/files\/9736-Estes-Pink-Flamingo-Model-Rocket-Angled.png?v=1776201914",
"aspect_ratio": 1.0,
"media_type": "image",
"src": {"alt":"Estes Pro Series II Pink Flamingo Beginner Model Rocket","id":47339984224561,"position":7,"preview_image":{"aspect_ratio":1.0,"height":1000,"width":1000,"src":"\/\/estesrockets.com\/cdn\/shop\/files\/9736-Estes-Pink-Flamingo-Model-Rocket-Angled.png?v=1776201914"},"aspect_ratio":1.0,"height":1000,"media_type":"image","src":"\/\/estesrockets.com\/cdn\/shop\/files\/9736-Estes-Pink-Flamingo-Model-Rocket-Angled.png?v=1776201914","width":1000}
}
],
"options": ["Title"
],
"options_with_values": [{
"name": "Title",
"position": 1,
"values": ["Default Title"
]
}
]
},
{
"id": 10713378586929,
"title": "Apollo 11 Anniversary Bundle",
"handle": "apollo-11-anniversary-bundle",
"vendor": "Estes Rockets",
"tags": ["Discount Eligible",
"published"
],
"price": 14999,
"price_max": 14999,
"price_min": 14999,
"compare_at_price": 14999,
"available": true,
"price_varies": false,
"compare_at_price_varies": false,
"url": "\/products\/apollo-11-anniversary-bundle",
"has_only_default_variant": true,
"variants": [{
"id": 55015917224241,
"title": "Default Title",
"option1": "Default Title",
"option2": null,
"option3": null,
"sku": "A11ABNDL",
"requires_shipping": true,
"taxable": true,
"featured_image": null,
"available": true,
"price": 14999,
"compare_at_price": 14999,
"weight": 0,
"weight_unit": "lb",
"inventory_quantity": 425,
"inventory_management": "shopify",
"inventory_policy": "deny",
"barcode": null
}
],
"selected_or_first_available_variant": {
"id": 55015917224241,
"title": "Default Title",
"price": 14999,
"compare_at_price": 14999,
"price_money": "$149.99",
"compare_at_price_money": "$149.99",
"available": true,
"sku": "A11ABNDL",
"weight": 0,
"featured_image": null
},
"images": [{
"id": 58805483569457,
"product_id": 10713378586929,
"position": 1,
"created_at": null,
"updated_at": null,
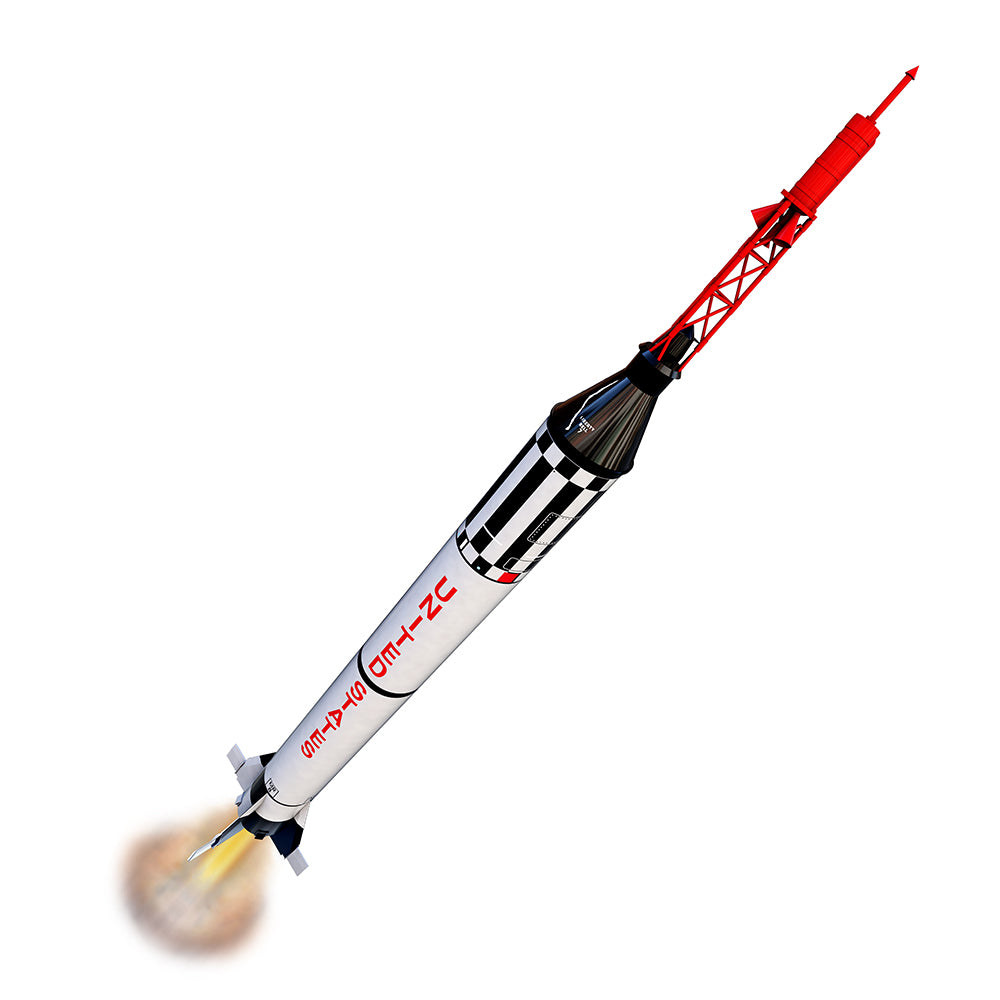
"alt": "Apollo 11 Anniversary Bundle Featuring the Estes Saturn V Ready-to-Fly Model Rocket",
"src": "\/\/estesrockets.com\/cdn\/shop\/files\/Apollo-11-Anniversary-Bundle-shadow.png?v=1783012256",
"variant_ids": []
},
{
"id": 58795144708401,
"product_id": 10713378586929,
"position": 2,
"created_at": null,
"updated_at": null,
"alt": "Estes Saturn V Flying Model Rocket Kit",
"src": "\/\/estesrockets.com\/cdn\/shop\/files\/2160_047776021600_PT04_94ff0457-5e7d-4e45-8d7c-a638813c1659.jpg?v=1677709421",
"variant_ids": []
},
{
"id": 58795144675633,
"product_id": 10713378586929,
"position": 3,
"created_at": null,
"updated_at": null,
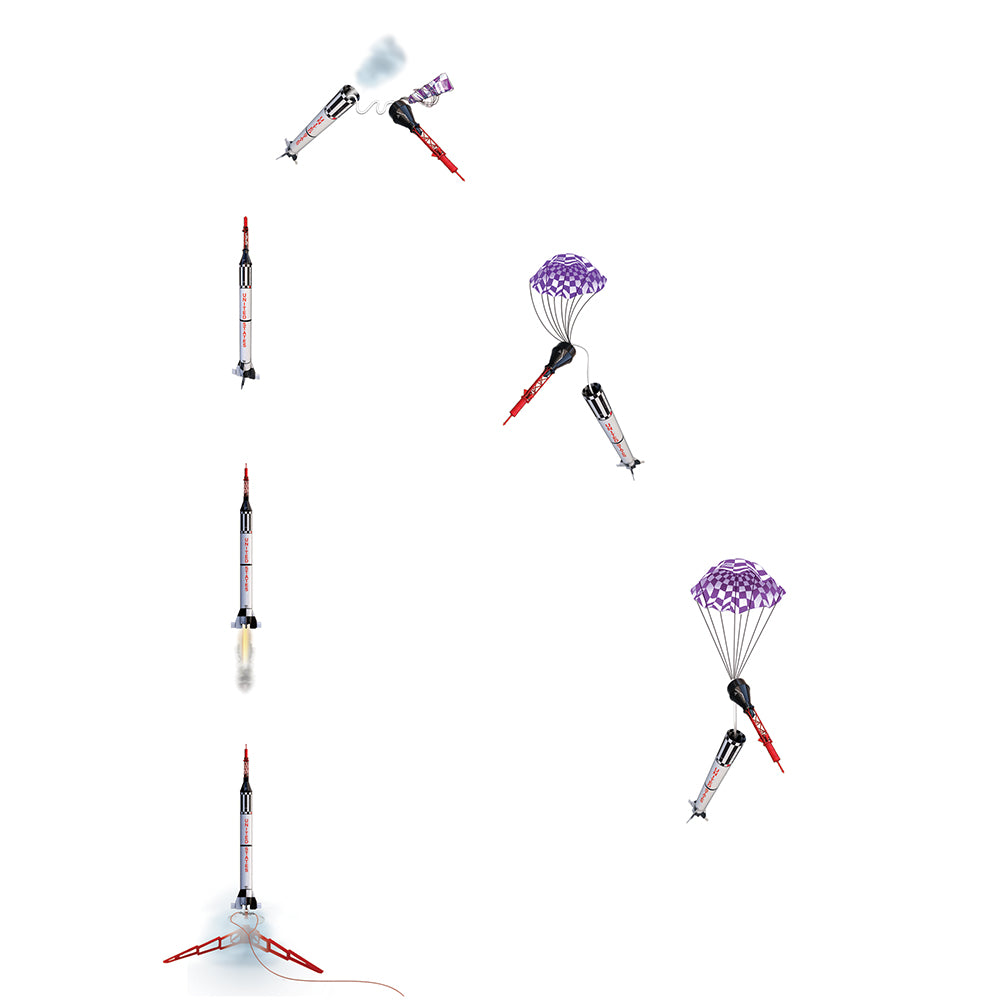
"alt": "Estes Saturn V Ready To Fly Model Rocket with Parachute Recovery",
"src": "\/\/estesrockets.com\/cdn\/shop\/files\/2160_047776021600_PT01_fb4fef72-7ed7-4862-a921-d54486af935d.jpg?v=1677709422",
"variant_ids": []
},
{
"id": 40821810430257,
"product_id": 10713378586929,
"position": 4,
"created_at": null,
"updated_at": null,
"alt": "Estes Saturn V Ready To Fly Model Rocket",
"src": "\/\/estesrockets.com\/cdn\/shop\/products\/2160047776021600PT06.jpg?v=1758743189",
"variant_ids": []
},
{
"id": 40821810135345,
"product_id": 10713378586929,
"position": 5,
"created_at": null,
"updated_at": null,
"alt": "Estes Saturn V Flying Model Rocket",
"src": "\/\/estesrockets.com\/cdn\/shop\/products\/2160047776021600Main.jpg?v=1758743189",
"variant_ids": []
},
{
"id": 40821810495793,
"product_id": 10713378586929,
"position": 6,
"created_at": null,
"updated_at": null,
"alt": "Estes Saturn V Flying Model Rocket Clear Tail Fins",
"src": "\/\/estesrockets.com\/cdn\/shop\/products\/2160047776021600PT05.jpg?v=1758743189",
"variant_ids": []
},
{
"id": 40821809938737,
"product_id": 10713378586929,
"position": 7,
"created_at": null,
"updated_at": null,
"alt": "Estes Saturn V Model Rocket Display Stand",
"src": "\/\/estesrockets.com\/cdn\/shop\/products\/2160047776021600PT02.jpg?v=1758743189",
"variant_ids": []
},
{
"id": 57314591637809,
"product_id": 10713378586929,
"position": 8,
"created_at": null,
"updated_at": null,
"alt": "Estes Porta-Pad® II Launch Pad and Electron Beam® Launch Controller for model rockets",
"src": "\/\/estesrockets.com\/cdn\/shop\/files\/2222-Porta-Pad-II-Launch-Pad-Electron-Beam-Launch-Controller.png?v=1774459898",
"variant_ids": []
},
{
"id": 51504163422513,
"product_id": 10713378586929,
"position": 9,
"created_at": null,
"updated_at": null,
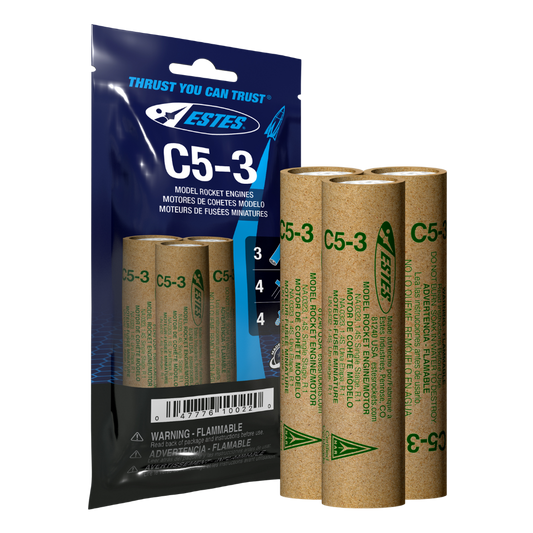
"alt": "Estes C5-3 Model Rocket Engines with Plugs and Ignitors",
"src": "\/\/estesrockets.com\/cdn\/shop\/files\/010022-C5-3-Engines-Plugs-Ignitors.jpg?v=1751991341",
"variant_ids": []
},
{
"id": 51504162373937,
"product_id": 10713378586929,
"position": 10,
"created_at": null,
"updated_at": null,
"alt": "Estes C5-3 18mm Model Rocket Engines",
"src": "\/\/estesrockets.com\/cdn\/shop\/files\/010022-C5-3-Engines-Bag.png?v=1751991341",
"variant_ids": []
},
{
"id": 54424167285041,
"product_id": 10713378586929,
"position": 11,
"created_at": null,
"updated_at": null,
"alt": "Estes Model Rocket Recovery Wadding",
"src": "\/\/estesrockets.com\/cdn\/shop\/files\/2274-Estes-Model-Rocket-Recovery-Wadding.png?v=1776375829",
"variant_ids": []
}
],
"featured_image": "\/\/estesrockets.com\/cdn\/shop\/files\/Apollo-11-Anniversary-Bundle-shadow.png?v=1783012256",
"featured_media": {
"id": 48450867003697,
"position": 1,
"preview_image": "\/\/estesrockets.com\/cdn\/shop\/files\/Apollo-11-Anniversary-Bundle-shadow.png?v=1783012256",
"aspect_ratio": 1.0,
"media_type": "image",
"src": {"alt":"Apollo 11 Anniversary Bundle Featuring the Estes Saturn V Ready-to-Fly Model Rocket","id":48450867003697,"position":1,"preview_image":{"aspect_ratio":1.0,"height":1000,"width":1000,"src":"\/\/estesrockets.com\/cdn\/shop\/files\/Apollo-11-Anniversary-Bundle-shadow.png?v=1783012256"},"aspect_ratio":1.0,"height":1000,"media_type":"image","src":"\/\/estesrockets.com\/cdn\/shop\/files\/Apollo-11-Anniversary-Bundle-shadow.png?v=1783012256","width":1000}
},
"first_available_variant": {"id":55015917224241,"title":"Default Title","option1":"Default Title","option2":null,"option3":null,"sku":"A11ABNDL","requires_shipping":true,"taxable":true,"featured_image":null,"available":true,"name":"Apollo 11 Anniversary Bundle","public_title":null,"options":["Default Title"],"price":14999,"weight":0,"compare_at_price":14999,"inventory_management":"shopify","barcode":null,"requires_selling_plan":false,"selling_plan_allocations":[],"quantity_rule":{"min":1,"max":null,"increment":1}},
"media": [{
"id": 48450867003697,
"position": 1,
"preview_image": "\/\/estesrockets.com\/cdn\/shop\/files\/Apollo-11-Anniversary-Bundle-shadow.png?v=1783012256",
"aspect_ratio": 1.0,
"media_type": "image",
"src": {"alt":"Apollo 11 Anniversary Bundle Featuring the Estes Saturn V Ready-to-Fly Model Rocket","id":48450867003697,"position":1,"preview_image":{"aspect_ratio":1.0,"height":1000,"width":1000,"src":"\/\/estesrockets.com\/cdn\/shop\/files\/Apollo-11-Anniversary-Bundle-shadow.png?v=1783012256"},"aspect_ratio":1.0,"height":1000,"media_type":"image","src":"\/\/estesrockets.com\/cdn\/shop\/files\/Apollo-11-Anniversary-Bundle-shadow.png?v=1783012256","width":1000}
},
{
"id": 33359104082225,
"position": 2,
"preview_image": "\/\/estesrockets.com\/cdn\/shop\/files\/2160_047776021600_PT04_94ff0457-5e7d-4e45-8d7c-a638813c1659.jpg?v=1677709421",
"aspect_ratio": 1.0,
"media_type": "image",
"src": {"alt":"Estes Saturn V Flying Model Rocket Kit","id":33359104082225,"position":2,"preview_image":{"aspect_ratio":1.0,"height":1000,"width":1000,"src":"\/\/estesrockets.com\/cdn\/shop\/files\/2160_047776021600_PT04_94ff0457-5e7d-4e45-8d7c-a638813c1659.jpg?v=1677709421"},"aspect_ratio":1.0,"height":1000,"media_type":"image","src":"\/\/estesrockets.com\/cdn\/shop\/files\/2160_047776021600_PT04_94ff0457-5e7d-4e45-8d7c-a638813c1659.jpg?v=1677709421","width":1000}
},
{
"id": 33359104114993,
"position": 3,
"preview_image": "\/\/estesrockets.com\/cdn\/shop\/files\/2160_047776021600_PT01_fb4fef72-7ed7-4862-a921-d54486af935d.jpg?v=1677709422",
"aspect_ratio": 1.0,
"media_type": "image",
"src": {"alt":"Estes Saturn V Ready To Fly Model Rocket with Parachute Recovery","id":33359104114993,"position":3,"preview_image":{"aspect_ratio":1.0,"height":1000,"width":1000,"src":"\/\/estesrockets.com\/cdn\/shop\/files\/2160_047776021600_PT01_fb4fef72-7ed7-4862-a921-d54486af935d.jpg?v=1677709422"},"aspect_ratio":1.0,"height":1000,"media_type":"image","src":"\/\/estesrockets.com\/cdn\/shop\/files\/2160_047776021600_PT01_fb4fef72-7ed7-4862-a921-d54486af935d.jpg?v=1677709422","width":1000}
},
{
"id": 33330655592753,
"position": 4,
"preview_image": "\/\/estesrockets.com\/cdn\/shop\/products\/2160047776021600PT06.jpg?v=1758743189",
"aspect_ratio": 1.0,
"media_type": "image",
"src": {"alt":"Estes Saturn V Ready To Fly Model Rocket","id":33330655592753,"position":4,"preview_image":{"aspect_ratio":1.0,"height":1000,"width":1000,"src":"\/\/estesrockets.com\/cdn\/shop\/products\/2160047776021600PT06.jpg?v=1758743189"},"aspect_ratio":1.0,"height":1000,"media_type":"image","src":"\/\/estesrockets.com\/cdn\/shop\/products\/2160047776021600PT06.jpg?v=1758743189","width":1000}
},
{
"id": 33330655723825,
"position": 5,
"preview_image": "\/\/estesrockets.com\/cdn\/shop\/products\/2160047776021600Main.jpg?v=1758743189",
"aspect_ratio": 1.0,
"media_type": "image",
"src": {"alt":"Estes Saturn V Flying Model Rocket","id":33330655723825,"position":5,"preview_image":{"aspect_ratio":1.0,"height":1000,"width":1000,"src":"\/\/estesrockets.com\/cdn\/shop\/products\/2160047776021600Main.jpg?v=1758743189"},"aspect_ratio":1.0,"height":1000,"media_type":"image","src":"\/\/estesrockets.com\/cdn\/shop\/products\/2160047776021600Main.jpg?v=1758743189","width":1000}
},
{
"id": 33330655920433,
"position": 6,
"preview_image": "\/\/estesrockets.com\/cdn\/shop\/products\/2160047776021600PT05.jpg?v=1758743189",
"aspect_ratio": 1.0,
"media_type": "image",
"src": {"alt":"Estes Saturn V Flying Model Rocket Clear Tail Fins","id":33330655920433,"position":6,"preview_image":{"aspect_ratio":1.0,"height":1000,"width":1000,"src":"\/\/estesrockets.com\/cdn\/shop\/products\/2160047776021600PT05.jpg?v=1758743189"},"aspect_ratio":1.0,"height":1000,"media_type":"image","src":"\/\/estesrockets.com\/cdn\/shop\/products\/2160047776021600PT05.jpg?v=1758743189","width":1000}
},
{
"id": 33330655822129,
"position": 7,
"preview_image": "\/\/estesrockets.com\/cdn\/shop\/products\/2160047776021600PT02.jpg?v=1758743189",
"aspect_ratio": 1.0,
"media_type": "image",
"src": {"alt":"Estes Saturn V Model Rocket Display Stand","id":33330655822129,"position":7,"preview_image":{"aspect_ratio":1.0,"height":1000,"width":1000,"src":"\/\/estesrockets.com\/cdn\/shop\/products\/2160047776021600PT02.jpg?v=1758743189"},"aspect_ratio":1.0,"height":1000,"media_type":"image","src":"\/\/estesrockets.com\/cdn\/shop\/products\/2160047776021600PT02.jpg?v=1758743189","width":1000}
},
{
"id": 47045377392945,
"position": 8,
"preview_image": "\/\/estesrockets.com\/cdn\/shop\/files\/2222-Porta-Pad-II-Launch-Pad-Electron-Beam-Launch-Controller.png?v=1774459898",
"aspect_ratio": 1.0,
"media_type": "image",
"src": {"alt":"Estes Porta-Pad® II Launch Pad and Electron Beam® Launch Controller for model rockets","id":47045377392945,"position":8,"preview_image":{"aspect_ratio":1.0,"height":1000,"width":1000,"src":"\/\/estesrockets.com\/cdn\/shop\/files\/2222-Porta-Pad-II-Launch-Pad-Electron-Beam-Launch-Controller.png?v=1774459898"},"aspect_ratio":1.0,"height":1000,"media_type":"image","src":"\/\/estesrockets.com\/cdn\/shop\/files\/2222-Porta-Pad-II-Launch-Pad-Electron-Beam-Launch-Controller.png?v=1774459898","width":1000}
},
{
"id": 42050408218929,
"position": 9,
"preview_image": "\/\/estesrockets.com\/cdn\/shop\/files\/010022-C5-3-Engines-Plugs-Ignitors.jpg?v=1751991341",
"aspect_ratio": 1.0,
"media_type": "image",
"src": {"alt":"Estes C5-3 Model Rocket Engines with Plugs and Ignitors","id":42050408218929,"position":9,"preview_image":{"aspect_ratio":1.0,"height":2400,"width":2400,"src":"\/\/estesrockets.com\/cdn\/shop\/files\/010022-C5-3-Engines-Plugs-Ignitors.jpg?v=1751991341"},"aspect_ratio":1.0,"height":2400,"media_type":"image","src":"\/\/estesrockets.com\/cdn\/shop\/files\/010022-C5-3-Engines-Plugs-Ignitors.jpg?v=1751991341","width":2400}
},
{
"id": 42050408022321,
"position": 10,
"preview_image": "\/\/estesrockets.com\/cdn\/shop\/files\/010022-C5-3-Engines-Bag.png?v=1751991341",
"aspect_ratio": 1.0,
"media_type": "image",
"src": {"alt":"Estes C5-3 18mm Model Rocket Engines","id":42050408022321,"position":10,"preview_image":{"aspect_ratio":1.0,"height":1000,"width":1000,"src":"\/\/estesrockets.com\/cdn\/shop\/files\/010022-C5-3-Engines-Bag.png?v=1751991341"},"aspect_ratio":1.0,"height":1000,"media_type":"image","src":"\/\/estesrockets.com\/cdn\/shop\/files\/010022-C5-3-Engines-Bag.png?v=1751991341","width":1000}
},
{
"id": 44445110305073,
"position": 11,
"preview_image": "\/\/estesrockets.com\/cdn\/shop\/files\/2274-Estes-Model-Rocket-Recovery-Wadding.png?v=1776375829",
"aspect_ratio": 1.0,
"media_type": "image",
"src": {"alt":"Estes Model Rocket Recovery Wadding","id":44445110305073,"position":11,"preview_image":{"aspect_ratio":1.0,"height":1000,"width":1000,"src":"\/\/estesrockets.com\/cdn\/shop\/files\/2274-Estes-Model-Rocket-Recovery-Wadding.png?v=1776375829"},"aspect_ratio":1.0,"height":1000,"media_type":"image","src":"\/\/estesrockets.com\/cdn\/shop\/files\/2274-Estes-Model-Rocket-Recovery-Wadding.png?v=1776375829","width":1000}
}
],
"options": ["Title"
],
"options_with_values": [{
"name": "Title",
"position": 1,
"values": ["Default Title"
]
}
]
},
{
"id": 10650593558833,
"title": "Liberty Star™",
"handle": "liberty-star",
"vendor": "Estes Rockets",
"tags": ["Best Seller",
"Discount Eligible",
"published",
"Rocket"
],
"price": 2999,
"price_max": 2999,
"price_min": 2999,
"compare_at_price": 2999,
"available": true,
"price_varies": false,
"compare_at_price_varies": false,
"url": "\/products\/liberty-star",
"has_only_default_variant": true,
"variants": [{
"id": 53800140243249,
"title": "Default Title",
"option1": "Default Title",
"option2": null,
"option3": null,
"sku": "000691",
"requires_shipping": true,
"taxable": true,
"featured_image": null,
"available": true,
"price": 2999,
"compare_at_price": 2999,
"weight": 369,
"weight_unit": "oz",
"inventory_quantity": 262,
"inventory_management": "shopify",
"inventory_policy": "deny",
"barcode": "047776006911"
}
],
"selected_or_first_available_variant": {
"id": 53800140243249,
"title": "Default Title",
"price": 2999,
"compare_at_price": 2999,
"price_money": "$29.99",
"compare_at_price_money": "$29.99",
"available": true,
"sku": "000691",
"weight": 369,
"featured_image": null
},
"images": [{
"id": 58539603132721,
"product_id": 10650593558833,
"position": 1,
"created_at": null,
"updated_at": null,
"alt": "Estes Liberty Star Beginner Model Rocket Kit - Celebrating 250 Years of Liberty ",
"src": "\/\/estesrockets.com\/cdn\/shop\/files\/0691-Liberty-Star-Model-Rocket-Kit-shadow.png?v=1781640942",
"variant_ids": []
},
{
"id": 57626583695665,
"product_id": 10650593558833,
"position": 2,
"created_at": null,
"updated_at": null,
"alt": "Estes Liberty Star Flying Model Rocket Kit ",
"src": "\/\/estesrockets.com\/cdn\/shop\/files\/0691-Liberty-Star-Up-Flame.png?v=1776197899",
"variant_ids": []
},
{
"id": 57626583793969,
"product_id": 10650593558833,
"position": 3,
"created_at": null,
"updated_at": null,
"alt": "Estes Liberty Star Beginner Model Rocket Kit - Red White and Blue America themed",
"src": "\/\/estesrockets.com\/cdn\/shop\/files\/0691-Liberty-Star-Recovery.png?v=1776197899",
"variant_ids": []
},
{
"id": 57626583662897,
"product_id": 10650593558833,
"position": 4,
"created_at": null,
"updated_at": null,
"alt": "Estes Liberty Star Beginner Model Rocket Kit - Celebrating 250 Years of American Independence",
"src": "\/\/estesrockets.com\/cdn\/shop\/files\/0691-Liberty-Star-Up.png?v=1776197899",
"variant_ids": []
},
{
"id": 57626583826737,
"product_id": 10650593558833,
"position": 5,
"created_at": null,
"updated_at": null,
"alt": "Estes Liberty Star Patriotic Red White and Blue Model Rocket Kit ",
"src": "\/\/estesrockets.com\/cdn\/shop\/files\/0691-Liberty-Star-Straight.png?v=1776197899",
"variant_ids": []
},
{
"id": 57626583728433,
"product_id": 10650593558833,
"position": 6,
"created_at": null,
"updated_at": null,
"alt": "Estes Liberty Star American Themed Flying Model Rocket",
"src": "\/\/estesrockets.com\/cdn\/shop\/files\/0691-Liberty-Star-Dynamic.png?v=1776197899",
"variant_ids": []
}
],
"featured_image": "\/\/estesrockets.com\/cdn\/shop\/files\/0691-Liberty-Star-Model-Rocket-Kit-shadow.png?v=1781640942",
"featured_media": {
"id": 48194642149681,
"position": 1,
"preview_image": "\/\/estesrockets.com\/cdn\/shop\/files\/0691-Liberty-Star-Model-Rocket-Kit-shadow.png?v=1781640942",
"aspect_ratio": 1.0,
"media_type": "image",
"src": {"alt":"Estes Liberty Star Beginner Model Rocket Kit - Celebrating 250 Years of Liberty ","id":48194642149681,"position":1,"preview_image":{"aspect_ratio":1.0,"height":1000,"width":1000,"src":"\/\/estesrockets.com\/cdn\/shop\/files\/0691-Liberty-Star-Model-Rocket-Kit-shadow.png?v=1781640942"},"aspect_ratio":1.0,"height":1000,"media_type":"image","src":"\/\/estesrockets.com\/cdn\/shop\/files\/0691-Liberty-Star-Model-Rocket-Kit-shadow.png?v=1781640942","width":1000}
},
"first_available_variant": {"id":53800140243249,"title":"Default Title","option1":"Default Title","option2":null,"option3":null,"sku":"000691","requires_shipping":true,"taxable":true,"featured_image":null,"available":true,"name":"Liberty Star™","public_title":null,"options":["Default Title"],"price":2999,"weight":369,"compare_at_price":2999,"inventory_management":"shopify","barcode":"047776006911","requires_selling_plan":false,"selling_plan_allocations":[],"quantity_rule":{"min":1,"max":null,"increment":1}},
"media": [{
"id": 48194642149681,
"position": 1,
"preview_image": "\/\/estesrockets.com\/cdn\/shop\/files\/0691-Liberty-Star-Model-Rocket-Kit-shadow.png?v=1781640942",
"aspect_ratio": 1.0,
"media_type": "image",
"src": {"alt":"Estes Liberty Star Beginner Model Rocket Kit - Celebrating 250 Years of Liberty ","id":48194642149681,"position":1,"preview_image":{"aspect_ratio":1.0,"height":1000,"width":1000,"src":"\/\/estesrockets.com\/cdn\/shop\/files\/0691-Liberty-Star-Model-Rocket-Kit-shadow.png?v=1781640942"},"aspect_ratio":1.0,"height":1000,"media_type":"image","src":"\/\/estesrockets.com\/cdn\/shop\/files\/0691-Liberty-Star-Model-Rocket-Kit-shadow.png?v=1781640942","width":1000}
},
{
"id": 47339112628529,
"position": 2,
"preview_image": "\/\/estesrockets.com\/cdn\/shop\/files\/0691-Liberty-Star-Up-Flame.png?v=1776197899",
"aspect_ratio": 1.0,
"media_type": "image",
"src": {"alt":"Estes Liberty Star Flying Model Rocket Kit ","id":47339112628529,"position":2,"preview_image":{"aspect_ratio":1.0,"height":3000,"width":3000,"src":"\/\/estesrockets.com\/cdn\/shop\/files\/0691-Liberty-Star-Up-Flame.png?v=1776197899"},"aspect_ratio":1.0,"height":3000,"media_type":"image","src":"\/\/estesrockets.com\/cdn\/shop\/files\/0691-Liberty-Star-Up-Flame.png?v=1776197899","width":3000}
},
{
"id": 47339112726833,
"position": 3,
"preview_image": "\/\/estesrockets.com\/cdn\/shop\/files\/0691-Liberty-Star-Recovery.png?v=1776197899",
"aspect_ratio": 1.0,
"media_type": "image",
"src": {"alt":"Estes Liberty Star Beginner Model Rocket Kit - Red White and Blue America themed","id":47339112726833,"position":3,"preview_image":{"aspect_ratio":1.0,"height":3000,"width":3000,"src":"\/\/estesrockets.com\/cdn\/shop\/files\/0691-Liberty-Star-Recovery.png?v=1776197899"},"aspect_ratio":1.0,"height":3000,"media_type":"image","src":"\/\/estesrockets.com\/cdn\/shop\/files\/0691-Liberty-Star-Recovery.png?v=1776197899","width":3000}
},
{
"id": 48183117447473,
"position": 4,
"preview_image": "\/\/estesrockets.com\/cdn\/shop\/files\/preview_images\/08f08875b4c34784848b84935f42fc5d.thumbnail.0000000000.jpg?v=1781562173",
"aspect_ratio": 1.775,
"media_type": "video",
"src": null
},
{
"id": 47339112595761,
"position": 5,
"preview_image": "\/\/estesrockets.com\/cdn\/shop\/files\/0691-Liberty-Star-Up.png?v=1776197899",
"aspect_ratio": 1.0,
"media_type": "image",
"src": {"alt":"Estes Liberty Star Beginner Model Rocket Kit - Celebrating 250 Years of American Independence","id":47339112595761,"position":5,"preview_image":{"aspect_ratio":1.0,"height":3000,"width":3000,"src":"\/\/estesrockets.com\/cdn\/shop\/files\/0691-Liberty-Star-Up.png?v=1776197899"},"aspect_ratio":1.0,"height":3000,"media_type":"image","src":"\/\/estesrockets.com\/cdn\/shop\/files\/0691-Liberty-Star-Up.png?v=1776197899","width":3000}
},
{
"id": 47339112759601,
"position": 6,
"preview_image": "\/\/estesrockets.com\/cdn\/shop\/files\/0691-Liberty-Star-Straight.png?v=1776197899",
"aspect_ratio": 1.0,
"media_type": "image",
"src": {"alt":"Estes Liberty Star Patriotic Red White and Blue Model Rocket Kit ","id":47339112759601,"position":6,"preview_image":{"aspect_ratio":1.0,"height":3000,"width":3000,"src":"\/\/estesrockets.com\/cdn\/shop\/files\/0691-Liberty-Star-Straight.png?v=1776197899"},"aspect_ratio":1.0,"height":3000,"media_type":"image","src":"\/\/estesrockets.com\/cdn\/shop\/files\/0691-Liberty-Star-Straight.png?v=1776197899","width":3000}
},
{
"id": 47339112661297,
"position": 7,
"preview_image": "\/\/estesrockets.com\/cdn\/shop\/files\/0691-Liberty-Star-Dynamic.png?v=1776197899",
"aspect_ratio": 1.0,
"media_type": "image",
"src": {"alt":"Estes Liberty Star American Themed Flying Model Rocket","id":47339112661297,"position":7,"preview_image":{"aspect_ratio":1.0,"height":3000,"width":3000,"src":"\/\/estesrockets.com\/cdn\/shop\/files\/0691-Liberty-Star-Dynamic.png?v=1776197899"},"aspect_ratio":1.0,"height":3000,"media_type":"image","src":"\/\/estesrockets.com\/cdn\/shop\/files\/0691-Liberty-Star-Dynamic.png?v=1776197899","width":3000}
}
],
"options": ["Title"
],
"options_with_values": [{
"name": "Title",
"position": 1,
"values": ["Default Title"
]
}
]
},
{
"id": 10649533710641,
"title": "1\/4A3-3T Engine Bulk Pack",
"handle": "1-4a3-3t-engine-bulk-pack",
"vendor": "Estes Rockets",
"tags": ["engines",
"published",
"Restricted Shipping - APO DPO FPO EPO",
"Restricted Shipping - Canada"
],
"price": 6499,
"price_max": 6499,
"price_min": 6499,
"compare_at_price": 6499,
"available": true,
"price_varies": false,
"compare_at_price_varies": false,
"url": "\/products\/1-4a3-3t-engine-bulk-pack",
"has_only_default_variant": true,
"variants": [{
"id": 53736139489585,
"title": "Default Title",
"option1": "Default Title",
"option2": null,
"option3": null,
"sku": "001699",
"requires_shipping": true,
"taxable": true,
"featured_image": null,
"available": true,
"price": 6499,
"compare_at_price": 6499,
"weight": 272,
"weight_unit": "lb",
"inventory_quantity": 324,
"inventory_management": "shopify",
"inventory_policy": "deny",
"barcode": "047776016996"
}
],
"selected_or_first_available_variant": {
"id": 53736139489585,
"title": "Default Title",
"price": 6499,
"compare_at_price": 6499,
"price_money": "$64.99",
"compare_at_price_money": "$64.99",
"available": true,
"sku": "001699",
"weight": 272,
"featured_image": null
},
"images": [{
"id": 58273117045041,
"product_id": 10649533710641,
"position": 1,
"created_at": null,
"updated_at": null,
"alt": "Estes 1\/4A3-3T Model Rocket Engine Bulk Pack",
"src": "\/\/estesrockets.com\/cdn\/shop\/files\/1699-Qtr-A3-3T-Model-Rocket-Engine-Bulk-Pack.png?v=1780081591",
"variant_ids": []
},
{
"id": 58273117077809,
"product_id": 10649533710641,
"position": 2,
"created_at": null,
"updated_at": null,
"alt": "Estes 1\/4A3-3T 13mm Model Rocket Engine Bulk Pack Contents",
"src": "\/\/estesrockets.com\/cdn\/shop\/files\/1699-Qtr-A3-3T-Model-Rocket-Engine-Bulk-Pack-Contents.png?v=1780081591",
"variant_ids": []
},
{
"id": 55871362498865,
"product_id": 10649533710641,
"position": 3,
"created_at": null,
"updated_at": null,
"alt": "Estes 1\/4A3-3T Model Rocket Engines Assembly How To",
"src": "\/\/estesrockets.com\/cdn\/shop\/files\/010010-1-4-A3-3T-Model-Rocket-Engines-Lifestyle.jpg?v=1768433734",
"variant_ids": []
},
{
"id": 46063130673457,
"product_id": 10649533710641,
"position": 4,
"created_at": null,
"updated_at": null,
"alt": "001504 - 1\/2A3 Model Rocket Engine Thrust Curve Chart",
"src": "\/\/estesrockets.com\/cdn\/shop\/files\/quarter-A3-rocket-engine-thrust-curve-chart.jpg?v=1768433734",
"variant_ids": []
},
{
"id": 46062673035569,
"product_id": 10649533710641,
"position": 5,
"created_at": null,
"updated_at": null,
"alt": "Model Rocket Thrust Curve Example",
"src": "\/\/estesrockets.com\/cdn\/shop\/files\/Model-Rocket-Thrust-Curve-Examples.jpg?v=1776111312",
"variant_ids": []
}
],
"featured_image": "\/\/estesrockets.com\/cdn\/shop\/files\/1699-Qtr-A3-3T-Model-Rocket-Engine-Bulk-Pack.png?v=1780081591",
"featured_media": {
"id": 47941950406961,
"position": 1,
"preview_image": "\/\/estesrockets.com\/cdn\/shop\/files\/1699-Qtr-A3-3T-Model-Rocket-Engine-Bulk-Pack.png?v=1780081591",
"aspect_ratio": 1.0,
"media_type": "image",
"src": {"alt":"Estes 1\/4A3-3T Model Rocket Engine Bulk Pack","id":47941950406961,"position":1,"preview_image":{"aspect_ratio":1.0,"height":2400,"width":2400,"src":"\/\/estesrockets.com\/cdn\/shop\/files\/1699-Qtr-A3-3T-Model-Rocket-Engine-Bulk-Pack.png?v=1780081591"},"aspect_ratio":1.0,"height":2400,"media_type":"image","src":"\/\/estesrockets.com\/cdn\/shop\/files\/1699-Qtr-A3-3T-Model-Rocket-Engine-Bulk-Pack.png?v=1780081591","width":2400}
},
"first_available_variant": {"id":53736139489585,"title":"Default Title","option1":"Default Title","option2":null,"option3":null,"sku":"001699","requires_shipping":true,"taxable":true,"featured_image":null,"available":true,"name":"1\/4A3-3T Engine Bulk Pack","public_title":null,"options":["Default Title"],"price":6499,"weight":272,"compare_at_price":6499,"inventory_management":"shopify","barcode":"047776016996","requires_selling_plan":false,"selling_plan_allocations":[],"quantity_rule":{"min":1,"max":null,"increment":1}},
"media": [{
"id": 47941950406961,
"position": 1,
"preview_image": "\/\/estesrockets.com\/cdn\/shop\/files\/1699-Qtr-A3-3T-Model-Rocket-Engine-Bulk-Pack.png?v=1780081591",
"aspect_ratio": 1.0,
"media_type": "image",
"src": {"alt":"Estes 1\/4A3-3T Model Rocket Engine Bulk Pack","id":47941950406961,"position":1,"preview_image":{"aspect_ratio":1.0,"height":2400,"width":2400,"src":"\/\/estesrockets.com\/cdn\/shop\/files\/1699-Qtr-A3-3T-Model-Rocket-Engine-Bulk-Pack.png?v=1780081591"},"aspect_ratio":1.0,"height":2400,"media_type":"image","src":"\/\/estesrockets.com\/cdn\/shop\/files\/1699-Qtr-A3-3T-Model-Rocket-Engine-Bulk-Pack.png?v=1780081591","width":2400}
},
{
"id": 47941950439729,
"position": 2,
"preview_image": "\/\/estesrockets.com\/cdn\/shop\/files\/1699-Qtr-A3-3T-Model-Rocket-Engine-Bulk-Pack-Contents.png?v=1780081591",
"aspect_ratio": 1.0,
"media_type": "image",
"src": {"alt":"Estes 1\/4A3-3T 13mm Model Rocket Engine Bulk Pack Contents","id":47941950439729,"position":2,"preview_image":{"aspect_ratio":1.0,"height":2400,"width":2400,"src":"\/\/estesrockets.com\/cdn\/shop\/files\/1699-Qtr-A3-3T-Model-Rocket-Engine-Bulk-Pack-Contents.png?v=1780081591"},"aspect_ratio":1.0,"height":2400,"media_type":"image","src":"\/\/estesrockets.com\/cdn\/shop\/files\/1699-Qtr-A3-3T-Model-Rocket-Engine-Bulk-Pack-Contents.png?v=1780081591","width":2400}
},
{
"id": 45677228589361,
"position": 3,
"preview_image": "\/\/estesrockets.com\/cdn\/shop\/files\/010010-1-4-A3-3T-Model-Rocket-Engines-Lifestyle.jpg?v=1768433734",
"aspect_ratio": 1.0,
"media_type": "image",
"src": {"alt":"Estes 1\/4A3-3T Model Rocket Engines Assembly How To","id":45677228589361,"position":3,"preview_image":{"aspect_ratio":1.0,"height":2400,"width":2400,"src":"\/\/estesrockets.com\/cdn\/shop\/files\/010010-1-4-A3-3T-Model-Rocket-Engines-Lifestyle.jpg?v=1768433734"},"aspect_ratio":1.0,"height":2400,"media_type":"image","src":"\/\/estesrockets.com\/cdn\/shop\/files\/010010-1-4-A3-3T-Model-Rocket-Engines-Lifestyle.jpg?v=1768433734","width":2400}
},
{
"id": 41551330902321,
"position": 4,
"preview_image": "\/\/estesrockets.com\/cdn\/shop\/files\/preview_images\/a7801d837c364877814440bf8b09e5e6.thumbnail.0000000000.jpg?v=1749487618",
"aspect_ratio": 1.775,
"media_type": "video",
"src": null
},
{
"id": 38704540221745,
"position": 5,
"preview_image": "\/\/estesrockets.com\/cdn\/shop\/files\/quarter-A3-rocket-engine-thrust-curve-chart.jpg?v=1768433734",
"aspect_ratio": 1.0,
"media_type": "image",
"src": {"alt":"001504 - 1\/2A3 Model Rocket Engine Thrust Curve Chart","id":38704540221745,"position":5,"preview_image":{"aspect_ratio":1.0,"height":1200,"width":1200,"src":"\/\/estesrockets.com\/cdn\/shop\/files\/quarter-A3-rocket-engine-thrust-curve-chart.jpg?v=1768433734"},"aspect_ratio":1.0,"height":1200,"media_type":"image","src":"\/\/estesrockets.com\/cdn\/shop\/files\/quarter-A3-rocket-engine-thrust-curve-chart.jpg?v=1768433734","width":1200}
},
{
"id": 38704154116401,
"position": 6,
"preview_image": "\/\/estesrockets.com\/cdn\/shop\/files\/Model-Rocket-Thrust-Curve-Examples.jpg?v=1776111312",
"aspect_ratio": 1.0,
"media_type": "image",
"src": {"alt":"Model Rocket Thrust Curve Example","id":38704154116401,"position":6,"preview_image":{"aspect_ratio":1.0,"height":1200,"width":1200,"src":"\/\/estesrockets.com\/cdn\/shop\/files\/Model-Rocket-Thrust-Curve-Examples.jpg?v=1776111312"},"aspect_ratio":1.0,"height":1200,"media_type":"image","src":"\/\/estesrockets.com\/cdn\/shop\/files\/Model-Rocket-Thrust-Curve-Examples.jpg?v=1776111312","width":1200}
}
],
"options": ["Title"
],
"options_with_values": [{
"name": "Title",
"position": 1,
"values": ["Default Title"
]
}
]
},
{
"id": 10645742846257,
"title": "Firecrest™ Bulk Pack (12 pk)",
"handle": "firecrest-bulk-pack",
"vendor": "Estes Rockets",
"tags": ["Discount Eligible",
"published"
],
"price": 6999,
"price_max": 6999,
"price_min": 6999,
"compare_at_price": 6999,
"available": true,
"price_varies": false,
"compare_at_price_varies": false,
"url": "\/products\/firecrest-bulk-pack",
"has_only_default_variant": true,
"variants": [{
"id": 53675560960305,
"title": "Default Title",
"option1": "Default Title",
"option2": null,
"option3": null,
"sku": "005334",
"requires_shipping": true,
"taxable": true,
"featured_image": null,
"available": true,
"price": 6999,
"compare_at_price": 6999,
"weight": 198,
"weight_unit": "oz",
"inventory_quantity": 246,
"inventory_management": "shopify",
"inventory_policy": "deny",
"barcode": "0477760053346"
}
],
"selected_or_first_available_variant": {
"id": 53675560960305,
"title": "Default Title",
"price": 6999,
"compare_at_price": 6999,
"price_money": "$69.99",
"compare_at_price_money": "$69.99",
"available": true,
"sku": "005334",
"weight": 198,
"featured_image": null
},
"images": [{
"id": 57535032295729,
"product_id": 10645742846257,
"position": 1,
"created_at": null,
"updated_at": null,
"alt": "Estes Firecrest Flying Model Rocket Kit Bulk Pack",
"src": "\/\/estesrockets.com\/cdn\/shop\/files\/5334-Firecrest-Bulk-Pack-Model-Rockets-Retail-Box.png?v=1775654833",
"variant_ids": []
},
{
"id": 57535032394033,
"product_id": 10645742846257,
"position": 2,
"created_at": null,
"updated_at": null,
"alt": "Estes Firecrest Flying Model Rocket Kit Bulk Pack with 12 Rockets Included",
"src": "\/\/estesrockets.com\/cdn\/shop\/files\/5334-Firecrest-Model-Rocket-Bulk-Pack.png?v=1775654833",
"variant_ids": []
},
{
"id": 57535032328497,
"product_id": 10645742846257,
"position": 3,
"created_at": null,
"updated_at": null,
"alt": "Estes Firecrest Flying Model Rocket",
"src": "\/\/estesrockets.com\/cdn\/shop\/files\/5334-Firecrest-Flying-Model-Rocket.png?v=1775654833",
"variant_ids": []
},
{
"id": 57535032197425,
"product_id": 10645742846257,
"position": 4,
"created_at": null,
"updated_at": null,
"alt": "Estes Firecrest Flying Model Rocket Streamer Recovery",
"src": "\/\/estesrockets.com\/cdn\/shop\/files\/5334-Firecrest-Model-Rocket-Streamer-Recovery.png?v=1775654833",
"variant_ids": []
},
{
"id": 57535032230193,
"product_id": 10645742846257,
"position": 5,
"created_at": null,
"updated_at": null,
"alt": "Estes Firecrest Model Rocket",
"src": "\/\/estesrockets.com\/cdn\/shop\/files\/5334-Firecrest-Model-Rocket-Upright.png?v=1775654833",
"variant_ids": []
},
{
"id": 57535032262961,
"product_id": 10645742846257,
"position": 6,
"created_at": null,
"updated_at": null,
"alt": "Estes Firecrest Beginner Model Rocket",
"src": "\/\/estesrockets.com\/cdn\/shop\/files\/5334-Firecrest-Model-Rocket-Upright-2.png?v=1775654833",
"variant_ids": []
},
{
"id": 57535032361265,
"product_id": 10645742846257,
"position": 7,
"created_at": null,
"updated_at": null,
"alt": "Firecrest Model Rocket for Beginners",
"src": "\/\/estesrockets.com\/cdn\/shop\/files\/5334-Firecrest-Model-Rocket.png?v=1775654833",
"variant_ids": []
}
],
"featured_image": "\/\/estesrockets.com\/cdn\/shop\/files\/5334-Firecrest-Bulk-Pack-Model-Rockets-Retail-Box.png?v=1775654833",
"featured_media": {
"id": 47253354610993,
"position": 1,
"preview_image": "\/\/estesrockets.com\/cdn\/shop\/files\/5334-Firecrest-Bulk-Pack-Model-Rockets-Retail-Box.png?v=1775654833",
"aspect_ratio": 1.0,
"media_type": "image",
"src": {"alt":"Estes Firecrest Flying Model Rocket Kit Bulk Pack","id":47253354610993,"position":1,"preview_image":{"aspect_ratio":1.0,"height":1000,"width":1000,"src":"\/\/estesrockets.com\/cdn\/shop\/files\/5334-Firecrest-Bulk-Pack-Model-Rockets-Retail-Box.png?v=1775654833"},"aspect_ratio":1.0,"height":1000,"media_type":"image","src":"\/\/estesrockets.com\/cdn\/shop\/files\/5334-Firecrest-Bulk-Pack-Model-Rockets-Retail-Box.png?v=1775654833","width":1000}
},
"first_available_variant": {"id":53675560960305,"title":"Default Title","option1":"Default Title","option2":null,"option3":null,"sku":"005334","requires_shipping":true,"taxable":true,"featured_image":null,"available":true,"name":"Firecrest™ Bulk Pack (12 pk)","public_title":null,"options":["Default Title"],"price":6999,"weight":198,"compare_at_price":6999,"inventory_management":"shopify","barcode":"0477760053346","requires_selling_plan":false,"selling_plan_allocations":[],"quantity_rule":{"min":1,"max":null,"increment":1}},
"media": [{
"id": 47253354610993,
"position": 1,
"preview_image": "\/\/estesrockets.com\/cdn\/shop\/files\/5334-Firecrest-Bulk-Pack-Model-Rockets-Retail-Box.png?v=1775654833",
"aspect_ratio": 1.0,
"media_type": "image",
"src": {"alt":"Estes Firecrest Flying Model Rocket Kit Bulk Pack","id":47253354610993,"position":1,"preview_image":{"aspect_ratio":1.0,"height":1000,"width":1000,"src":"\/\/estesrockets.com\/cdn\/shop\/files\/5334-Firecrest-Bulk-Pack-Model-Rockets-Retail-Box.png?v=1775654833"},"aspect_ratio":1.0,"height":1000,"media_type":"image","src":"\/\/estesrockets.com\/cdn\/shop\/files\/5334-Firecrest-Bulk-Pack-Model-Rockets-Retail-Box.png?v=1775654833","width":1000}
},
{
"id": 47253354709297,
"position": 2,
"preview_image": "\/\/estesrockets.com\/cdn\/shop\/files\/5334-Firecrest-Model-Rocket-Bulk-Pack.png?v=1775654833",
"aspect_ratio": 1.0,
"media_type": "image",
"src": {"alt":"Estes Firecrest Flying Model Rocket Kit Bulk Pack with 12 Rockets Included","id":47253354709297,"position":2,"preview_image":{"aspect_ratio":1.0,"height":1000,"width":1000,"src":"\/\/estesrockets.com\/cdn\/shop\/files\/5334-Firecrest-Model-Rocket-Bulk-Pack.png?v=1775654833"},"aspect_ratio":1.0,"height":1000,"media_type":"image","src":"\/\/estesrockets.com\/cdn\/shop\/files\/5334-Firecrest-Model-Rocket-Bulk-Pack.png?v=1775654833","width":1000}
},
{
"id": 47253354643761,
"position": 3,
"preview_image": "\/\/estesrockets.com\/cdn\/shop\/files\/5334-Firecrest-Flying-Model-Rocket.png?v=1775654833",
"aspect_ratio": 1.0,
"media_type": "image",
"src": {"alt":"Estes Firecrest Flying Model Rocket","id":47253354643761,"position":3,"preview_image":{"aspect_ratio":1.0,"height":1000,"width":1000,"src":"\/\/estesrockets.com\/cdn\/shop\/files\/5334-Firecrest-Flying-Model-Rocket.png?v=1775654833"},"aspect_ratio":1.0,"height":1000,"media_type":"image","src":"\/\/estesrockets.com\/cdn\/shop\/files\/5334-Firecrest-Flying-Model-Rocket.png?v=1775654833","width":1000}
},
{
"id": 47253354512689,
"position": 4,
"preview_image": "\/\/estesrockets.com\/cdn\/shop\/files\/5334-Firecrest-Model-Rocket-Streamer-Recovery.png?v=1775654833",
"aspect_ratio": 1.0,
"media_type": "image",
"src": {"alt":"Estes Firecrest Flying Model Rocket Streamer Recovery","id":47253354512689,"position":4,"preview_image":{"aspect_ratio":1.0,"height":1000,"width":1000,"src":"\/\/estesrockets.com\/cdn\/shop\/files\/5334-Firecrest-Model-Rocket-Streamer-Recovery.png?v=1775654833"},"aspect_ratio":1.0,"height":1000,"media_type":"image","src":"\/\/estesrockets.com\/cdn\/shop\/files\/5334-Firecrest-Model-Rocket-Streamer-Recovery.png?v=1775654833","width":1000}
},
{
"id": 47253354545457,
"position": 5,
"preview_image": "\/\/estesrockets.com\/cdn\/shop\/files\/5334-Firecrest-Model-Rocket-Upright.png?v=1775654833",
"aspect_ratio": 1.0,
"media_type": "image",
"src": {"alt":"Estes Firecrest Model Rocket","id":47253354545457,"position":5,"preview_image":{"aspect_ratio":1.0,"height":1000,"width":1000,"src":"\/\/estesrockets.com\/cdn\/shop\/files\/5334-Firecrest-Model-Rocket-Upright.png?v=1775654833"},"aspect_ratio":1.0,"height":1000,"media_type":"image","src":"\/\/estesrockets.com\/cdn\/shop\/files\/5334-Firecrest-Model-Rocket-Upright.png?v=1775654833","width":1000}
},
{
"id": 47253354578225,
"position": 6,
"preview_image": "\/\/estesrockets.com\/cdn\/shop\/files\/5334-Firecrest-Model-Rocket-Upright-2.png?v=1775654833",
"aspect_ratio": 1.0,
"media_type": "image",
"src": {"alt":"Estes Firecrest Beginner Model Rocket","id":47253354578225,"position":6,"preview_image":{"aspect_ratio":1.0,"height":1000,"width":1000,"src":"\/\/estesrockets.com\/cdn\/shop\/files\/5334-Firecrest-Model-Rocket-Upright-2.png?v=1775654833"},"aspect_ratio":1.0,"height":1000,"media_type":"image","src":"\/\/estesrockets.com\/cdn\/shop\/files\/5334-Firecrest-Model-Rocket-Upright-2.png?v=1775654833","width":1000}
},
{
"id": 47253354676529,
"position": 7,
"preview_image": "\/\/estesrockets.com\/cdn\/shop\/files\/5334-Firecrest-Model-Rocket.png?v=1775654833",
"aspect_ratio": 1.0,
"media_type": "image",
"src": {"alt":"Firecrest Model Rocket for Beginners","id":47253354676529,"position":7,"preview_image":{"aspect_ratio":1.0,"height":1000,"width":1000,"src":"\/\/estesrockets.com\/cdn\/shop\/files\/5334-Firecrest-Model-Rocket.png?v=1775654833"},"aspect_ratio":1.0,"height":1000,"media_type":"image","src":"\/\/estesrockets.com\/cdn\/shop\/files\/5334-Firecrest-Model-Rocket.png?v=1775654833","width":1000}
}
],
"options": ["Title"
],
"options_with_values": [{
"name": "Title",
"position": 1,
"values": ["Default Title"
]
}
]
},
{
"id": 8201888956721,
"title": "Recovery Wadding",
"handle": "recovery-wadding",
"vendor": "Estes Rockets",
"tags": ["2274",
"Best Seller",
"Discount Eligible",
"Labor Day Sale - 15% Off",
"published"
],
"price": 599,
"price_max": 599,
"price_min": 599,
"compare_at_price": 599,
"available": true,
"price_varies": false,
"compare_at_price_varies": false,
"url": "\/products\/recovery-wadding",
"has_only_default_variant": true,
"variants": [{
"id": 44470373515569,
"title": "Default Title",
"option1": "Default Title",
"option2": null,
"option3": null,
"sku": "002274",
"requires_shipping": true,
"taxable": true,
"featured_image": null,
"available": true,
"price": 599,
"compare_at_price": 599,
"weight": 227,
"weight_unit": "lb",
"inventory_quantity": 4570,
"inventory_management": "shopify",
"inventory_policy": "deny",
"barcode": "047776022744"
}
],
"selected_or_first_available_variant": {
"id": 44470373515569,
"title": "Default Title",
"price": 599,
"compare_at_price": 599,
"price_money": "$5.99",
"compare_at_price_money": "$5.99",
"available": true,
"sku": "002274",
"weight": 227,
"featured_image": null
},
"images": [{
"id": 54424167285041,
"product_id": 8201888956721,
"position": 1,
"created_at": null,
"updated_at": null,
"alt": "Estes Model Rocket Recovery Wadding",
"src": "\/\/estesrockets.com\/cdn\/shop\/files\/2274-Estes-Model-Rocket-Recovery-Wadding.png?v=1776375829",
"variant_ids": []
},
{
"id": 56881096524081,
"product_id": 8201888956721,
"position": 2,
"created_at": null,
"updated_at": null,
"alt": "Recovery Wadding for Model Rockets",
"src": "\/\/estesrockets.com\/cdn\/shop\/files\/2274-Model-Rocket-Recovery-Wadding-Parts.png?v=1772386705",
"variant_ids": []
}
],
"featured_image": "\/\/estesrockets.com\/cdn\/shop\/files\/2274-Estes-Model-Rocket-Recovery-Wadding.png?v=1776375829",
"featured_media": {
"id": 44445110305073,
"position": 1,
"preview_image": "\/\/estesrockets.com\/cdn\/shop\/files\/2274-Estes-Model-Rocket-Recovery-Wadding.png?v=1776375829",
"aspect_ratio": 1.0,
"media_type": "image",
"src": {"alt":"Estes Model Rocket Recovery Wadding","id":44445110305073,"position":1,"preview_image":{"aspect_ratio":1.0,"height":1000,"width":1000,"src":"\/\/estesrockets.com\/cdn\/shop\/files\/2274-Estes-Model-Rocket-Recovery-Wadding.png?v=1776375829"},"aspect_ratio":1.0,"height":1000,"media_type":"image","src":"\/\/estesrockets.com\/cdn\/shop\/files\/2274-Estes-Model-Rocket-Recovery-Wadding.png?v=1776375829","width":1000}
},
"first_available_variant": {"id":44470373515569,"title":"Default Title","option1":"Default Title","option2":null,"option3":null,"sku":"002274","requires_shipping":true,"taxable":true,"featured_image":null,"available":true,"name":"Recovery Wadding","public_title":null,"options":["Default Title"],"price":599,"weight":227,"compare_at_price":599,"inventory_management":"shopify","barcode":"047776022744","requires_selling_plan":false,"selling_plan_allocations":[],"quantity_rule":{"min":1,"max":null,"increment":1}},
"media": [{
"id": 44445110305073,
"position": 1,
"preview_image": "\/\/estesrockets.com\/cdn\/shop\/files\/2274-Estes-Model-Rocket-Recovery-Wadding.png?v=1776375829",
"aspect_ratio": 1.0,
"media_type": "image",
"src": {"alt":"Estes Model Rocket Recovery Wadding","id":44445110305073,"position":1,"preview_image":{"aspect_ratio":1.0,"height":1000,"width":1000,"src":"\/\/estesrockets.com\/cdn\/shop\/files\/2274-Estes-Model-Rocket-Recovery-Wadding.png?v=1776375829"},"aspect_ratio":1.0,"height":1000,"media_type":"image","src":"\/\/estesrockets.com\/cdn\/shop\/files\/2274-Estes-Model-Rocket-Recovery-Wadding.png?v=1776375829","width":1000}
},
{
"id": 46637042958641,
"position": 2,
"preview_image": "\/\/estesrockets.com\/cdn\/shop\/files\/2274-Model-Rocket-Recovery-Wadding-Parts.png?v=1772386705",
"aspect_ratio": 1.0,
"media_type": "image",
"src": {"alt":"Recovery Wadding for Model Rockets","id":46637042958641,"position":2,"preview_image":{"aspect_ratio":1.0,"height":1000,"width":1000,"src":"\/\/estesrockets.com\/cdn\/shop\/files\/2274-Model-Rocket-Recovery-Wadding-Parts.png?v=1772386705"},"aspect_ratio":1.0,"height":1000,"media_type":"image","src":"\/\/estesrockets.com\/cdn\/shop\/files\/2274-Model-Rocket-Recovery-Wadding-Parts.png?v=1772386705","width":1000}
}
],
"options": ["Title"
],
"options_with_values": [{
"name": "Title",
"position": 1,
"values": ["Default Title"
]
}
]
},
{
"id": 8201867362609,
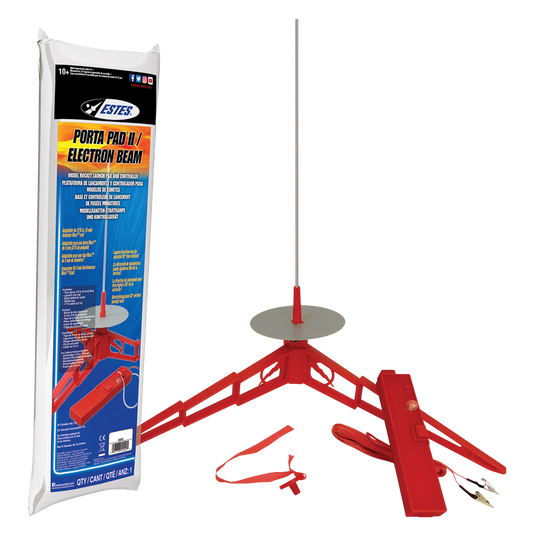
"title": "Porta-Pad® II Launch Pad and Electron Beam® Launch Controller",
"handle": "porta-pad-ii-launch-pad-and-controller",
"vendor": "Estes Rockets",
"tags": ["Best Seller",
"Discount Eligible",
"Labor Day Sale - 15% Off",
"published"
],
"price": 3999,
"price_max": 3999,
"price_min": 3999,
"compare_at_price": 3999,
"available": true,
"price_varies": false,
"compare_at_price_varies": false,
"url": "\/products\/porta-pad-ii-launch-pad-and-controller",
"has_only_default_variant": true,
"variants": [{
"id": 44470304604465,
"title": "Default Title",
"option1": "Default Title",
"option2": null,
"option3": null,
"sku": "002222",
"requires_shipping": true,
"taxable": true,
"featured_image": null,
"available": true,
"price": 3999,
"compare_at_price": 3999,
"weight": 454,
"weight_unit": "lb",
"inventory_quantity": 3980,
"inventory_management": "shopify",
"inventory_policy": "deny",
"barcode": "047776022225"
}
],
"selected_or_first_available_variant": {
"id": 44470304604465,
"title": "Default Title",
"price": 3999,
"compare_at_price": 3999,
"price_money": "$39.99",
"compare_at_price_money": "$39.99",
"available": true,
"sku": "002222",
"weight": 454,
"featured_image": null
},
"images": [{
"id": 57314591637809,
"product_id": 8201867362609,
"position": 1,
"created_at": null,
"updated_at": null,
"alt": "Estes Porta-Pad® II Launch Pad and Electron Beam® Launch Controller for model rockets",
"src": "\/\/estesrockets.com\/cdn\/shop\/files\/2222-Porta-Pad-II-Launch-Pad-Electron-Beam-Launch-Controller.png?v=1774459898",
"variant_ids": []
},
{
"id": 56881117692209,
"product_id": 8201867362609,
"position": 2,
"created_at": null,
"updated_at": null,
"alt": "Estes Porta-Pad II Launch Pad and Controller for Model Rockets ",
"src": "\/\/estesrockets.com\/cdn\/shop\/files\/2222-Porta-Pad-II-Electron-Beam-Rocket-Launch-Pad.png?v=1774459898",
"variant_ids": []
},
{
"id": 53249610350897,
"product_id": 8201867362609,
"position": 3,
"created_at": null,
"updated_at": null,
"alt": "Estes Porta-Pad II Launch Pad and Controller Parts",
"src": "\/\/estesrockets.com\/cdn\/shop\/files\/2222-Launch-Pad-Parts.jpg?v=1774457384",
"variant_ids": []
},
{
"id": 53249610383665,
"product_id": 8201867362609,
"position": 4,
"created_at": null,
"updated_at": null,
"alt": "Estes Electron Beam Launch Controller",
"src": "\/\/estesrockets.com\/cdn\/shop\/files\/2222-Electron-Beam.jpg?v=1774459898",
"variant_ids": []
},
{
"id": 53249610318129,
"product_id": 8201867362609,
"position": 5,
"created_at": null,
"updated_at": null,
"alt": "Estes Rockets Porta-Pad II Launch Pad and Electron Beam Launch Controller",
"src": "\/\/estesrockets.com\/cdn\/shop\/files\/2222-Porta-Pad-II-Electron-Beam-Bag.jpg?v=1774457384",
"variant_ids": []
}
],
"featured_image": "\/\/estesrockets.com\/cdn\/shop\/files\/2222-Porta-Pad-II-Launch-Pad-Electron-Beam-Launch-Controller.png?v=1774459898",
"featured_media": {
"id": 47045377392945,
"position": 1,
"preview_image": "\/\/estesrockets.com\/cdn\/shop\/files\/2222-Porta-Pad-II-Launch-Pad-Electron-Beam-Launch-Controller.png?v=1774459898",
"aspect_ratio": 1.0,
"media_type": "image",
"src": {"alt":"Estes Porta-Pad® II Launch Pad and Electron Beam® Launch Controller for model rockets","id":47045377392945,"position":1,"preview_image":{"aspect_ratio":1.0,"height":1000,"width":1000,"src":"\/\/estesrockets.com\/cdn\/shop\/files\/2222-Porta-Pad-II-Launch-Pad-Electron-Beam-Launch-Controller.png?v=1774459898"},"aspect_ratio":1.0,"height":1000,"media_type":"image","src":"\/\/estesrockets.com\/cdn\/shop\/files\/2222-Porta-Pad-II-Launch-Pad-Electron-Beam-Launch-Controller.png?v=1774459898","width":1000}
},
"first_available_variant": {"id":44470304604465,"title":"Default Title","option1":"Default Title","option2":null,"option3":null,"sku":"002222","requires_shipping":true,"taxable":true,"featured_image":null,"available":true,"name":"Porta-Pad® II Launch Pad and Electron Beam® Launch Controller","public_title":null,"options":["Default Title"],"price":3999,"weight":454,"compare_at_price":3999,"inventory_management":"shopify","barcode":"047776022225","requires_selling_plan":false,"selling_plan_allocations":[],"quantity_rule":{"min":1,"max":null,"increment":1}},
"media": [{
"id": 47045377392945,
"position": 1,
"preview_image": "\/\/estesrockets.com\/cdn\/shop\/files\/2222-Porta-Pad-II-Launch-Pad-Electron-Beam-Launch-Controller.png?v=1774459898",
"aspect_ratio": 1.0,
"media_type": "image",
"src": {"alt":"Estes Porta-Pad® II Launch Pad and Electron Beam® Launch Controller for model rockets","id":47045377392945,"position":1,"preview_image":{"aspect_ratio":1.0,"height":1000,"width":1000,"src":"\/\/estesrockets.com\/cdn\/shop\/files\/2222-Porta-Pad-II-Launch-Pad-Electron-Beam-Launch-Controller.png?v=1774459898"},"aspect_ratio":1.0,"height":1000,"media_type":"image","src":"\/\/estesrockets.com\/cdn\/shop\/files\/2222-Porta-Pad-II-Launch-Pad-Electron-Beam-Launch-Controller.png?v=1774459898","width":1000}
},
{
"id": 46637062750513,
"position": 2,
"preview_image": "\/\/estesrockets.com\/cdn\/shop\/files\/2222-Porta-Pad-II-Electron-Beam-Rocket-Launch-Pad.png?v=1774459898",
"aspect_ratio": 1.0,
"media_type": "image",
"src": {"alt":"Estes Porta-Pad II Launch Pad and Controller for Model Rockets ","id":46637062750513,"position":2,"preview_image":{"aspect_ratio":1.0,"height":1000,"width":1000,"src":"\/\/estesrockets.com\/cdn\/shop\/files\/2222-Porta-Pad-II-Electron-Beam-Rocket-Launch-Pad.png?v=1774459898"},"aspect_ratio":1.0,"height":1000,"media_type":"image","src":"\/\/estesrockets.com\/cdn\/shop\/files\/2222-Porta-Pad-II-Electron-Beam-Rocket-Launch-Pad.png?v=1774459898","width":1000}
},
{
"id": 43298134360369,
"position": 3,
"preview_image": "\/\/estesrockets.com\/cdn\/shop\/files\/2222-Launch-Pad-Parts.jpg?v=1774457384",
"aspect_ratio": 1.0,
"media_type": "image",
"src": {"alt":"Estes Porta-Pad II Launch Pad and Controller Parts","id":43298134360369,"position":3,"preview_image":{"aspect_ratio":1.0,"height":1000,"width":1000,"src":"\/\/estesrockets.com\/cdn\/shop\/files\/2222-Launch-Pad-Parts.jpg?v=1774457384"},"aspect_ratio":1.0,"height":1000,"media_type":"image","src":"\/\/estesrockets.com\/cdn\/shop\/files\/2222-Launch-Pad-Parts.jpg?v=1774457384","width":1000}
},
{
"id": 43298134393137,
"position": 4,
"preview_image": "\/\/estesrockets.com\/cdn\/shop\/files\/2222-Electron-Beam.jpg?v=1774459898",
"aspect_ratio": 1.0,
"media_type": "image",
"src": {"alt":"Estes Electron Beam Launch Controller","id":43298134393137,"position":4,"preview_image":{"aspect_ratio":1.0,"height":1000,"width":1000,"src":"\/\/estesrockets.com\/cdn\/shop\/files\/2222-Electron-Beam.jpg?v=1774459898"},"aspect_ratio":1.0,"height":1000,"media_type":"image","src":"\/\/estesrockets.com\/cdn\/shop\/files\/2222-Electron-Beam.jpg?v=1774459898","width":1000}
},
{
"id": 43298134327601,
"position": 5,
"preview_image": "\/\/estesrockets.com\/cdn\/shop\/files\/2222-Porta-Pad-II-Electron-Beam-Bag.jpg?v=1774457384",
"aspect_ratio": 1.0,
"media_type": "image",
"src": {"alt":"Estes Rockets Porta-Pad II Launch Pad and Electron Beam Launch Controller","id":43298134327601,"position":5,"preview_image":{"aspect_ratio":1.0,"height":1000,"width":1000,"src":"\/\/estesrockets.com\/cdn\/shop\/files\/2222-Porta-Pad-II-Electron-Beam-Bag.jpg?v=1774457384"},"aspect_ratio":1.0,"height":1000,"media_type":"image","src":"\/\/estesrockets.com\/cdn\/shop\/files\/2222-Porta-Pad-II-Electron-Beam-Bag.jpg?v=1774457384","width":1000}
}
],
"options": ["Title"
],
"options_with_values": [{
"name": "Title",
"position": 1,
"values": ["Default Title"
]
}
]
},
{
"id": 8201852453169,
"title": "STARTECH™ Starters",
"handle": "startech-starters",
"vendor": "Estes Rockets",
"tags": ["Best Seller",
"Discount Eligible",
"Labor Day Sale - 15% Off",
"published"
],
"price": 699,
"price_max": 699,
"price_min": 699,
"compare_at_price": 699,
"available": true,
"price_varies": false,
"compare_at_price_varies": false,
"url": "\/products\/startech-starters",
"has_only_default_variant": true,
"variants": [{
"id": 44470259548465,
"title": "Default Title",
"option1": "Default Title",
"option2": null,
"option3": null,
"sku": "002303",
"requires_shipping": true,
"taxable": true,
"featured_image": null,
"available": true,
"price": 699,
"compare_at_price": 699,
"weight": 227,
"weight_unit": "lb",
"inventory_quantity": 10821,
"inventory_management": "shopify",
"inventory_policy": "deny",
"barcode": "047776023031"
}
],
"selected_or_first_available_variant": {
"id": 44470259548465,
"title": "Default Title",
"price": 699,
"compare_at_price": 699,
"price_money": "$6.99",
"compare_at_price_money": "$6.99",
"available": true,
"sku": "002303",
"weight": 227,
"featured_image": null
},
"images": [{
"id": 53352484503857,
"product_id": 8201852453169,
"position": 1,
"created_at": null,
"updated_at": null,
"alt": "Estes STARTECH Model Rocket Starters - Pack of 6",
"src": "\/\/estesrockets.com\/cdn\/shop\/files\/Estes-Startech-Model-Rocket-Starters.png?v=1758668766",
"variant_ids": []
},
{
"id": 40397086130481,
"product_id": 8201852453169,
"position": 2,
"created_at": null,
"updated_at": null,
"alt": "Startech Starters for Model Rocket Engines - 6 Pack",
"src": "\/\/estesrockets.com\/cdn\/shop\/products\/2303-StarTech-Sarters-Parts.png?v=1758668766",
"variant_ids": []
}
],
"featured_image": "\/\/estesrockets.com\/cdn\/shop\/files\/Estes-Startech-Model-Rocket-Starters.png?v=1758668766",
"featured_media": {
"id": 43399703920945,
"position": 1,
"preview_image": "\/\/estesrockets.com\/cdn\/shop\/files\/Estes-Startech-Model-Rocket-Starters.png?v=1758668766",
"aspect_ratio": 1.0,
"media_type": "image",
"src": {"alt":"Estes STARTECH Model Rocket Starters - Pack of 6","id":43399703920945,"position":1,"preview_image":{"aspect_ratio":1.0,"height":1000,"width":1000,"src":"\/\/estesrockets.com\/cdn\/shop\/files\/Estes-Startech-Model-Rocket-Starters.png?v=1758668766"},"aspect_ratio":1.0,"height":1000,"media_type":"image","src":"\/\/estesrockets.com\/cdn\/shop\/files\/Estes-Startech-Model-Rocket-Starters.png?v=1758668766","width":1000}
},
"first_available_variant": {"id":44470259548465,"title":"Default Title","option1":"Default Title","option2":null,"option3":null,"sku":"002303","requires_shipping":true,"taxable":true,"featured_image":null,"available":true,"name":"STARTECH™ Starters","public_title":null,"options":["Default Title"],"price":699,"weight":227,"compare_at_price":699,"inventory_management":"shopify","barcode":"047776023031","requires_selling_plan":false,"selling_plan_allocations":[],"quantity_rule":{"min":1,"max":null,"increment":1}},
"media": [{
"id": 43399703920945,
"position": 1,
"preview_image": "\/\/estesrockets.com\/cdn\/shop\/files\/Estes-Startech-Model-Rocket-Starters.png?v=1758668766",
"aspect_ratio": 1.0,
"media_type": "image",
"src": {"alt":"Estes STARTECH Model Rocket Starters - Pack of 6","id":43399703920945,"position":1,"preview_image":{"aspect_ratio":1.0,"height":1000,"width":1000,"src":"\/\/estesrockets.com\/cdn\/shop\/files\/Estes-Startech-Model-Rocket-Starters.png?v=1758668766"},"aspect_ratio":1.0,"height":1000,"media_type":"image","src":"\/\/estesrockets.com\/cdn\/shop\/files\/Estes-Startech-Model-Rocket-Starters.png?v=1758668766","width":1000}
},
{
"id": 32897901723953,
"position": 2,
"preview_image": "\/\/estesrockets.com\/cdn\/shop\/products\/2303-StarTech-Sarters-Parts.png?v=1758668766",
"aspect_ratio": 1.0,
"media_type": "image",
"src": {"alt":"Startech Starters for Model Rocket Engines - 6 Pack","id":32897901723953,"position":2,"preview_image":{"aspect_ratio":1.0,"height":1000,"width":1000,"src":"\/\/estesrockets.com\/cdn\/shop\/products\/2303-StarTech-Sarters-Parts.png?v=1758668766"},"aspect_ratio":1.0,"height":1000,"media_type":"image","src":"\/\/estesrockets.com\/cdn\/shop\/products\/2303-StarTech-Sarters-Parts.png?v=1758668766","width":1000}
}
],
"options": ["Title"
],
"options_with_values": [{
"name": "Title",
"position": 1,
"values": ["Default Title"
]
}
]
},
{
"id": 10320843800881,
"title": "Rip Stop Parachute",
"handle": "rip-stop-parachute",
"vendor": "Estes Rockets",
"tags": ["Best Seller",
"Discount Eligible",
"Labor Day Sale - 15% Off",
"NoSync",
"published"
],
"price": 675,
"price_max": 1799,
"price_min": 675,
"compare_at_price": 675,
"available": true,
"price_varies": true,
"compare_at_price_varies": true,
"url": "\/products\/rip-stop-parachute",
"has_only_default_variant": false,
"variants": [{
"id": 51944698839345,
"title": "15 inch",
"option1": "15 inch",
"option2": null,
"option3": null,
"sku": "302245",
"requires_shipping": true,
"taxable": true,
"featured_image": "\/\/estesrockets.com\/cdn\/shop\/files\/302245-Rip-Stop-Parachute-15in-Flat.png?v=1760719501",
"available": true,
"price": 675,
"compare_at_price": 675,
"weight": 23,
"weight_unit": "lb",
"inventory_quantity": 2477,
"inventory_management": "shopify",
"inventory_policy": "deny",
"barcode": null
},
{
"id": 51539275317553,
"title": "18 inch",
"option1": "18 inch",
"option2": null,
"option3": null,
"sku": "302246",
"requires_shipping": true,
"taxable": true,
"featured_image": "\/\/estesrockets.com\/cdn\/shop\/files\/Rip-Stop-Parachute-18in-Flat.png?v=1760719501",
"available": true,
"price": 999,
"compare_at_price": 999,
"weight": 23,
"weight_unit": "lb",
"inventory_quantity": 2595,
"inventory_management": "shopify",
"inventory_policy": "deny",
"barcode": null
},
{
"id": 51539308020017,
"title": "24 inch",
"option1": "24 inch",
"option2": null,
"option3": null,
"sku": "302247",
"requires_shipping": true,
"taxable": true,
"featured_image": "\/\/estesrockets.com\/cdn\/shop\/files\/Rip-Stop-Parachute-24in-Flat.png?v=1760719501",
"available": true,
"price": 1025,
"compare_at_price": 1025,
"weight": 23,
"weight_unit": "lb",
"inventory_quantity": 2824,
"inventory_management": "shopify",
"inventory_policy": "deny",
"barcode": null
},
{
"id": 51944686616881,
"title": "30 inch",
"option1": "30 inch",
"option2": null,
"option3": null,
"sku": "302248",
"requires_shipping": true,
"taxable": true,
"featured_image": "\/\/estesrockets.com\/cdn\/shop\/files\/302248-Rip-Stop-Parachute-30in-Flat.png?v=1760719501",
"available": true,
"price": 1549,
"compare_at_price": 1549,
"weight": 23,
"weight_unit": "lb",
"inventory_quantity": 1647,
"inventory_management": "shopify",
"inventory_policy": "deny",
"barcode": null
},
{
"id": 51539308052785,
"title": "36 inch",
"option1": "36 inch",
"option2": null,
"option3": null,
"sku": "302249",
"requires_shipping": true,
"taxable": true,
"featured_image": "\/\/estesrockets.com\/cdn\/shop\/files\/Rip-Stop-Parachute-36in-Flat.png?v=1760719501",
"available": true,
"price": 1799,
"compare_at_price": 1799,
"weight": 45,
"weight_unit": "lb",
"inventory_quantity": 1661,
"inventory_management": "shopify",
"inventory_policy": "deny",
"barcode": null
}
],
"selected_or_first_available_variant": {
"id": 51944698839345,
"title": "15 inch",
"price": 675,
"compare_at_price": 675,
"price_money": "$6.75",
"compare_at_price_money": "$6.75",
"available": true,
"sku": "302245",
"weight": 23,
"featured_image": "\/\/estesrockets.com\/cdn\/shop\/files\/302245-Rip-Stop-Parachute-15in-Flat.png?v=1760719501"
},
"images": [{
"id": 50657607024945,
"product_id": 10320843800881,
"position": 1,
"created_at": null,
"updated_at": null,
"alt": "Estes 15 inch Rip Stop Nylon Parachute for Model Rockets",
"src": "\/\/estesrockets.com\/cdn\/shop\/files\/302245-Rip-Stop-Parachute-15in.png?v=1760719501",
"variant_ids": []
},
{
"id": 51125390344497,
"product_id": 10320843800881,
"position": 2,
"created_at": null,
"updated_at": null,
"alt": "Estes 18 inch Rip Stop Nylon Parachute for Model Rockets",
"src": "\/\/estesrockets.com\/cdn\/shop\/files\/Rip-Stop-Parachute-18in.png?v=1760719501",
"variant_ids": []
},
{
"id": 51125422031153,
"product_id": 10320843800881,
"position": 3,
"created_at": null,
"updated_at": null,
"alt": "Estes 24 inch Red Rip Stop Nylon Parachute for Model Rockets",
"src": "\/\/estesrockets.com\/cdn\/shop\/files\/Rip-Stop-Parachute-24in.png?v=1760719501",
"variant_ids": []
},
{
"id": 50657607319857,
"product_id": 10320843800881,
"position": 4,
"created_at": null,
"updated_at": null,
"alt": "Estes 30 inch Rip Stop Nylon Parachute for Model Rockets",
"src": "\/\/estesrockets.com\/cdn\/shop\/files\/302248-Rip-Stop-Parachute-30in.png?v=1760719501",
"variant_ids": []
},
{
"id": 51125487829297,
"product_id": 10320843800881,
"position": 5,
"created_at": null,
"updated_at": null,
"alt": "Estes 36 inch Teal Rip Stop Nylon Parachute for Model Rockets",
"src": "\/\/estesrockets.com\/cdn\/shop\/files\/Rip-Stop-Parachute-36in.png?v=1760719501",
"variant_ids": []
},
{
"id": 50657607254321,
"product_id": 10320843800881,
"position": 6,
"created_at": null,
"updated_at": null,
"alt": "Estes 15 inch Purple Rip Stop Nylon Parachute for Model Rockets",
"src": "\/\/estesrockets.com\/cdn\/shop\/files\/302245-Rip-Stop-Parachute-15in-Flat.png?v=1760719501",
"variant_ids": []
},
{
"id": 51125390311729,
"product_id": 10320843800881,
"position": 7,
"created_at": null,
"updated_at": null,
"alt": "Estes 18 inch Blue Rip Stop Nylon Parachute for Model Rockets",
"src": "\/\/estesrockets.com\/cdn\/shop\/files\/Rip-Stop-Parachute-18in-Flat.png?v=1760719501",
"variant_ids": []
},
{
"id": 51125421867313,
"product_id": 10320843800881,
"position": 8,
"created_at": null,
"updated_at": null,
"alt": "Estes 24 inch Rip Stop Nylon Parachute for Model Rockets",
"src": "\/\/estesrockets.com\/cdn\/shop\/files\/Rip-Stop-Parachute-24in-Flat.png?v=1760719501",
"variant_ids": []
},
{
"id": 50657607188785,
"product_id": 10320843800881,
"position": 9,
"created_at": null,
"updated_at": null,
"alt": "Estes 30 inch Yellow Rip Stop Nylon Parachute for Model Rockets",
"src": "\/\/estesrockets.com\/cdn\/shop\/files\/302248-Rip-Stop-Parachute-30in-Flat.png?v=1760719501",
"variant_ids": []
},
{
"id": 51125487862065,
"product_id": 10320843800881,
"position": 10,
"created_at": null,
"updated_at": null,
"alt": "Estes 36 inch Rip Stop Nylon Parachute for Model Rockets",
"src": "\/\/estesrockets.com\/cdn\/shop\/files\/Rip-Stop-Parachute-36in-Flat.png?v=1760719501",
"variant_ids": []
}
],
"featured_image": "\/\/estesrockets.com\/cdn\/shop\/files\/302245-Rip-Stop-Parachute-15in.png?v=1760719501",
"featured_media": {
"id": 41580078498097,
"position": 1,
"preview_image": "\/\/estesrockets.com\/cdn\/shop\/files\/302245-Rip-Stop-Parachute-15in.png?v=1760719501",
"aspect_ratio": 1.0,
"media_type": "image",
"src": {"alt":"Estes 15 inch Rip Stop Nylon Parachute for Model Rockets","id":41580078498097,"position":1,"preview_image":{"aspect_ratio":1.0,"height":1000,"width":1000,"src":"\/\/estesrockets.com\/cdn\/shop\/files\/302245-Rip-Stop-Parachute-15in.png?v=1760719501"},"aspect_ratio":1.0,"height":1000,"media_type":"image","src":"\/\/estesrockets.com\/cdn\/shop\/files\/302245-Rip-Stop-Parachute-15in.png?v=1760719501","width":1000}
},
"first_available_variant": {"id":51944698839345,"title":"15 inch","option1":"15 inch","option2":null,"option3":null,"sku":"302245","requires_shipping":true,"taxable":true,"featured_image":{"id":50657607254321,"product_id":10320843800881,"position":6,"created_at":"2025-06-10T16:13:28-06:00","updated_at":"2025-10-17T10:45:01-06:00","alt":"Estes 15 inch Purple Rip Stop Nylon Parachute for Model Rockets","width":1000,"height":1000,"src":"\/\/estesrockets.com\/cdn\/shop\/files\/302245-Rip-Stop-Parachute-15in-Flat.png?v=1760719501","variant_ids":[51944698839345]},"available":true,"name":"Rip Stop Parachute - 15 inch","public_title":"15 inch","options":["15 inch"],"price":675,"weight":23,"compare_at_price":675,"inventory_management":"shopify","barcode":null,"featured_media":{"alt":"Estes 15 inch Purple Rip Stop Nylon Parachute for Model Rockets","id":41580078530865,"position":6,"preview_image":{"aspect_ratio":1.0,"height":1000,"width":1000,"src":"\/\/estesrockets.com\/cdn\/shop\/files\/302245-Rip-Stop-Parachute-15in-Flat.png?v=1760719501"}},"requires_selling_plan":false,"selling_plan_allocations":[],"quantity_rule":{"min":1,"max":null,"increment":1}},
"media": [{
"id": 41580078498097,
"position": 1,
"preview_image": "\/\/estesrockets.com\/cdn\/shop\/files\/302245-Rip-Stop-Parachute-15in.png?v=1760719501",
"aspect_ratio": 1.0,
"media_type": "image",
"src": {"alt":"Estes 15 inch Rip Stop Nylon Parachute for Model Rockets","id":41580078498097,"position":1,"preview_image":{"aspect_ratio":1.0,"height":1000,"width":1000,"src":"\/\/estesrockets.com\/cdn\/shop\/files\/302245-Rip-Stop-Parachute-15in.png?v=1760719501"},"aspect_ratio":1.0,"height":1000,"media_type":"image","src":"\/\/estesrockets.com\/cdn\/shop\/files\/302245-Rip-Stop-Parachute-15in.png?v=1760719501","width":1000}
},
{
"id": 41836872794417,
"position": 2,
"preview_image": "\/\/estesrockets.com\/cdn\/shop\/files\/Rip-Stop-Parachute-18in.png?v=1760719501",
"aspect_ratio": 1.0,
"media_type": "image",
"src": {"alt":"Estes 18 inch Rip Stop Nylon Parachute for Model Rockets","id":41836872794417,"position":2,"preview_image":{"aspect_ratio":1.0,"height":1000,"width":1000,"src":"\/\/estesrockets.com\/cdn\/shop\/files\/Rip-Stop-Parachute-18in.png?v=1760719501"},"aspect_ratio":1.0,"height":1000,"media_type":"image","src":"\/\/estesrockets.com\/cdn\/shop\/files\/Rip-Stop-Parachute-18in.png?v=1760719501","width":1000}
},
{
"id": 41836892029233,
"position": 3,
"preview_image": "\/\/estesrockets.com\/cdn\/shop\/files\/Rip-Stop-Parachute-24in.png?v=1760719501",
"aspect_ratio": 1.0,
"media_type": "image",
"src": {"alt":"Estes 24 inch Red Rip Stop Nylon Parachute for Model Rockets","id":41836892029233,"position":3,"preview_image":{"aspect_ratio":1.0,"height":1000,"width":1000,"src":"\/\/estesrockets.com\/cdn\/shop\/files\/Rip-Stop-Parachute-24in.png?v=1760719501"},"aspect_ratio":1.0,"height":1000,"media_type":"image","src":"\/\/estesrockets.com\/cdn\/shop\/files\/Rip-Stop-Parachute-24in.png?v=1760719501","width":1000}
},
{
"id": 41580078563633,
"position": 4,
"preview_image": "\/\/estesrockets.com\/cdn\/shop\/files\/302248-Rip-Stop-Parachute-30in.png?v=1760719501",
"aspect_ratio": 1.0,
"media_type": "image",
"src": {"alt":"Estes 30 inch Rip Stop Nylon Parachute for Model Rockets","id":41580078563633,"position":4,"preview_image":{"aspect_ratio":1.0,"height":1000,"width":1000,"src":"\/\/estesrockets.com\/cdn\/shop\/files\/302248-Rip-Stop-Parachute-30in.png?v=1760719501"},"aspect_ratio":1.0,"height":1000,"media_type":"image","src":"\/\/estesrockets.com\/cdn\/shop\/files\/302248-Rip-Stop-Parachute-30in.png?v=1760719501","width":1000}
},
{
"id": 41836931383601,
"position": 5,
"preview_image": "\/\/estesrockets.com\/cdn\/shop\/files\/Rip-Stop-Parachute-36in.png?v=1760719501",
"aspect_ratio": 1.0,
"media_type": "image",
"src": {"alt":"Estes 36 inch Teal Rip Stop Nylon Parachute for Model Rockets","id":41836931383601,"position":5,"preview_image":{"aspect_ratio":1.0,"height":1000,"width":1000,"src":"\/\/estesrockets.com\/cdn\/shop\/files\/Rip-Stop-Parachute-36in.png?v=1760719501"},"aspect_ratio":1.0,"height":1000,"media_type":"image","src":"\/\/estesrockets.com\/cdn\/shop\/files\/Rip-Stop-Parachute-36in.png?v=1760719501","width":1000}
},
{
"id": 41580078530865,
"position": 6,
"preview_image": "\/\/estesrockets.com\/cdn\/shop\/files\/302245-Rip-Stop-Parachute-15in-Flat.png?v=1760719501",
"aspect_ratio": 1.0,
"media_type": "image",
"src": {"alt":"Estes 15 inch Purple Rip Stop Nylon Parachute for Model Rockets","id":41580078530865,"position":6,"preview_image":{"aspect_ratio":1.0,"height":1000,"width":1000,"src":"\/\/estesrockets.com\/cdn\/shop\/files\/302245-Rip-Stop-Parachute-15in-Flat.png?v=1760719501"},"aspect_ratio":1.0,"height":1000,"media_type":"image","src":"\/\/estesrockets.com\/cdn\/shop\/files\/302245-Rip-Stop-Parachute-15in-Flat.png?v=1760719501","width":1000}
},
{
"id": 41836872761649,
"position": 7,
"preview_image": "\/\/estesrockets.com\/cdn\/shop\/files\/Rip-Stop-Parachute-18in-Flat.png?v=1760719501",
"aspect_ratio": 1.0,
"media_type": "image",
"src": {"alt":"Estes 18 inch Blue Rip Stop Nylon Parachute for Model Rockets","id":41836872761649,"position":7,"preview_image":{"aspect_ratio":1.0,"height":1000,"width":1000,"src":"\/\/estesrockets.com\/cdn\/shop\/files\/Rip-Stop-Parachute-18in-Flat.png?v=1760719501"},"aspect_ratio":1.0,"height":1000,"media_type":"image","src":"\/\/estesrockets.com\/cdn\/shop\/files\/Rip-Stop-Parachute-18in-Flat.png?v=1760719501","width":1000}
},
{
"id": 41836891963697,
"position": 8,
"preview_image": "\/\/estesrockets.com\/cdn\/shop\/files\/Rip-Stop-Parachute-24in-Flat.png?v=1760719501",
"aspect_ratio": 1.0,
"media_type": "image",
"src": {"alt":"Estes 24 inch Rip Stop Nylon Parachute for Model Rockets","id":41836891963697,"position":8,"preview_image":{"aspect_ratio":1.0,"height":1000,"width":1000,"src":"\/\/estesrockets.com\/cdn\/shop\/files\/Rip-Stop-Parachute-24in-Flat.png?v=1760719501"},"aspect_ratio":1.0,"height":1000,"media_type":"image","src":"\/\/estesrockets.com\/cdn\/shop\/files\/Rip-Stop-Parachute-24in-Flat.png?v=1760719501","width":1000}
},
{
"id": 41580078596401,
"position": 9,
"preview_image": "\/\/estesrockets.com\/cdn\/shop\/files\/302248-Rip-Stop-Parachute-30in-Flat.png?v=1760719501",
"aspect_ratio": 1.0,
"media_type": "image",
"src": {"alt":"Estes 30 inch Yellow Rip Stop Nylon Parachute for Model Rockets","id":41580078596401,"position":9,"preview_image":{"aspect_ratio":1.0,"height":1000,"width":1000,"src":"\/\/estesrockets.com\/cdn\/shop\/files\/302248-Rip-Stop-Parachute-30in-Flat.png?v=1760719501"},"aspect_ratio":1.0,"height":1000,"media_type":"image","src":"\/\/estesrockets.com\/cdn\/shop\/files\/302248-Rip-Stop-Parachute-30in-Flat.png?v=1760719501","width":1000}
},
{
"id": 41836931416369,
"position": 10,
"preview_image": "\/\/estesrockets.com\/cdn\/shop\/files\/Rip-Stop-Parachute-36in-Flat.png?v=1760719501",
"aspect_ratio": 1.0,
"media_type": "image",
"src": {"alt":"Estes 36 inch Rip Stop Nylon Parachute for Model Rockets","id":41836931416369,"position":10,"preview_image":{"aspect_ratio":1.0,"height":1000,"width":1000,"src":"\/\/estesrockets.com\/cdn\/shop\/files\/Rip-Stop-Parachute-36in-Flat.png?v=1760719501"},"aspect_ratio":1.0,"height":1000,"media_type":"image","src":"\/\/estesrockets.com\/cdn\/shop\/files\/Rip-Stop-Parachute-36in-Flat.png?v=1760719501","width":1000}
}
],
"options": ["Size"
],
"options_with_values": [{
"name": "Size",
"position": 1,
"values": ["15 inch",
"18 inch",
"24 inch",
"30 inch",
"36 inch"
]
}
]
}
]