


My son’s model rocket’s engine exploded right at ignition. My son said that the parachute deployed at the same time as ignition, but we never found out what caused the engine to explode. Also, the engine was a C5-3 or C6-3, or C6-5, and the model rocket was a corvette class space corps rocket.
Note: This piece is a submission by Estes Rockets fan and customer and young rocketeer Nishka! Estes is always proud to feature and support young rocketeers in all their endeavors in the wonderful science of rocketry.
Introduction
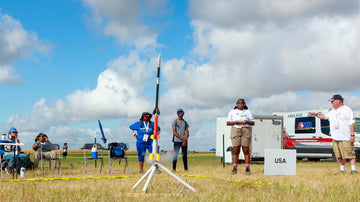
In the chill of winter weekends, with frozen fingers fumbling to tie together shock cord and build motors, I couldn’t be happier.
Besides the coolness of launching flaming projectiles, I get the chance to design and build a model rocket from scratch. I also love spending time with my team, rallying us together and leading them to the Team America Rocketry Challenge Nationals several times.
As I plot graphs of apogee vs rocket mass, or investigate different fin shapes on rocket simulators, I get to use my collective math and physics knowledge to experiment and work through the engineering design process. It often feels like I’m diagnosing the rocket for the reason for a varied apogee, and through the process, I have come up with a sort of guide for the problems I have encountered and their solutions.
However, I would also like the knowledge I gained to be shared across a wider rocketry community. As a result, I made this guide and hope that other TARC teams can also benefit from this work!
The guide is structured so that one can describe the details of their flights, and then refer to this guide to determine what might be the causes of the flights and how they could potentially fix them.
Flights
Straight Flights
Up and down. Nice! If this is the case, check out the altitudes section.
Parabola Flights
The rocket curves gently in its flight, being diverted from its initial course.
This is generally seen with the following:
- Curved flight
- Lower apogee than to be expected
To diagnose, consider the following questions:
- Was the rocket flying into the wind, as in, was it turning such that the wind is going to the left and the rocket begins moving to the right?
This is known as ‘weathercocking.’ All external forces are enacted on the center of pressure. When the wind hits the center of pressure (which should be below the center of gravity), the rocket swings around the center of gravity (as a pivot point) and thus the rocket points into the wind, and the motor thrust pushes it in this direction.
This can occur when the rocket is too unstable (rocket cannot swing back easily to correct itself; consider that torque is dependent on radius and with CP close to CG it will take more force to return to equilibrium, or it oscillates more - covered in Zigzag flights) or too stable (center of pressure swings around further).
To fix this, there are several modes of action:
- Try to only fly in ideal weather conditions (wind)
- Use a longer rod
- Make the rocket longer
- Sweep the fins aft
- Airfoil your fins
- Tilt your launch rod into the wind
2. Was there “no wind” - as in, practically no wind at ground level (but the rocket is having a parabolic flight in different directions)?
Ideally, these are the weather conditions you would want to fly under. However, due to general weather fluctuations, higher up in the troposphere it is likely for there to be even a brief gust of wind. Normally, this doesn’t affect the rocket flight significantly.
However, if the CP is too close to CG or too far from CG, this can occur. This can be measured by balancing the rocket on one’s finger (the location at which the rocket balances is the Center of Gravity), and using a simulation to determine the center of pressure.
The distance between the CP and CG (named the static margin) should ideally be the rocket diameter (referred to as 1 caliber).
If the static margin is larger, the wind will cause the CP to swing around more, and result in the rocket moving too far.
If the static margin is smaller, the wind will cause the CP to swing around, but it will also be harder for the rocket to return to its normal position, so the rocket will go slanted for a longer time.
In the designing of the rocket, however, this should have been fixed already. The issue occurs when the stability is changing, and parabolic flights have been occurring when they previously have not.
This can be due to several factors; such as: shifting CG position (such as something sliding aft that is inside the rocket), a crooked fin (most likely), or fin flutter (where a rocket fin becomes deformed or broken).
3. Is the rocket tilting in the same direction consistently?
This can also be due to an incorrect installation of the motor mount tube. If the inner tube was slightly tilted (say that the centering ring was also slightly tilted, which caused the whole tube to point in a way that is not parallel to the rocket itself), it would result in a hard installation (which is recognizable. Then, the motor is still propelling the rocket horizontally as well as vertically, which would cause a squirrely flight.
Zigzag flights
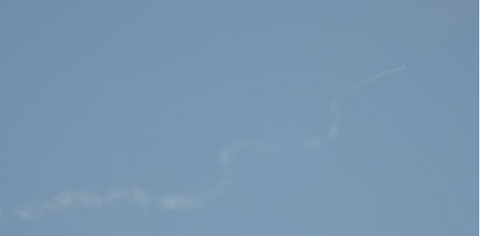
Generally, you can determine this based on the trail that the motor leaves behind.
This often occurs because the rocket repeatedly compensates for it’s weathercocking or swinging around, and thus the back of the rocket moves back and forth.
If the rocket straightens out, this is good - the wind may have initially caused a zig-zagging flights, but then the rocket is stable enough to right itself.
If not, with the rocket going to the side or upside down (worst case), there is an issue with rocket stability or motor power.
The stability issue occurs because the oscillation is amplified - where normally, the center of pressure with a normal force perpendicular to the rocket will bring the line from CP to CG back to being perpendicular to the ground. However, when CP is in front of CG, this normal force will cause the rocket to move even further, and spiral out of control.
If this appears to be the issue, a fast way to test it on ground is run this CP and CG test.
To fix this:
- Add mass to the front of the rocket to bring the CG back in front
- Change the fin design - increasing the area will increase drag as well, and so the CP will move further backwards. Note that this will also bring back the CG somewhat as well.
Horizontal Flights
A missile was created! Congratulations!
This has never happened to me, but it has happened to other teams that have launched rockets.
Some theories I have for why this happens are a combination of the following factors:
- Weaker motors than necessary, as in the rocket is not powerful enough to continue going upwards and thus with enough mass and awkwardly placed CG/CPs, the rocket turns horizontal.
- Partial motor failure (as in it is pushing forward irregularly, or it does not burn all the way).
- Mis-aligned fin(s)
- Mis-aligned motor mount
Parachute Deployment
Parachutes Deployed Before Apogee
This happens when the delay is too small. Running in RockSim/OpenRocket, look at the Simulation and identify the ‘Optimum Delay’ section. If this is larger than the delay (written on the motor. For example, F39-6T has a 6 second delay), then the rocket will deploy early.
*Do not think an F39-6T (3) has a 3 second delay! The 3 refers to the number of propellant kits in the reload package, so you can fly the rocket three times. The 6 is the time of the delay, because it precedes T.
If the delay in RockSim/OpenRocket is very close to the delay of your rocket, then there are potential variabilities with the actual individual products that can be addressed - and since you can’t add back delay to an element, the best bet with these variable products is to just not use those delay elements.
Alternatively, use a motor with a higher delay (for example, a F39-9T instead of a F39-6T) and then drill the motor down to the right number, or a bit more than the number mentioned by RockSim/OpenRocket, and then launch.
To attempt to determine if your delay is going off early by about 50 feet, the distinctive “pop” sound of the motor causing parachute deployment will likely occur before you can see the nose cone in front of the fins.
The rocket might also come apart at the launch rod itself, with the coupler being pulled out of the rocket. This is generally due to the motor being built incorrectly, such as with the absence of an o-ring or screw.
Parachutes Deployed At Apogee
Perfect! This is the ideal delay time.
If you want your flight time to be lower, you can try:
- Cutting spill holes into the parachutes
- Reefing the parachutes (placing tape on the parachute lines) so they open less
- Using parachutes with smaller diameters (so they don’t catch the air)
- Potentially picking a longer delay, but if the delay is too long, the rocket will turn into a ballistic missile speeding downwards, and the parachutes may eject too late or never.
Parachutes Deployed After Apogee
First, check the RockSim/OpenRocket sim to see if your delay is much longer than the desired amount for right after apogee.
If the delay is clearly too late or too early, mass the delays and use a delay drill to move it down to the amount you want.
No Deployment
For this, the most likely cause is just a mistake in motor construction.
For example, forgetting to drill the delay (a team from our school did this), and as a result, the rocket turned ballistic and hit the ground, crumpling the front half of the tube.
However, if this happens, there will still be a pop sound from the rocket, just later.
Alternatively, getting grease from the o-rings on the delay element could prevent the delay from getting ignited, causing a later deployment or none at all.
If there is no popping sound, ever, it’s likely that there was an issue with the coupler fit. This could be due to humidity (and body tubes and couplers swelling in size) and being unable to pull apart. It could also be due to something like a piece of shock cord getting stuck between the transition and the body tube so that they hit each other and cannot be removed. It could also be due to the parachute cords getting stuck. To prevent this from happening, try this simple shaking test.
Deployed, but Strange
This could include any of the following issues:
|
Parachutes with burn/singe marks: Often in symmetrical patterns that align with the parachute’s folding |
The fire blanket or Dog Barf/wadding was not successful in covering up all of the inner tube where the motor is. As a result, the hot gases of the motor burned the parachutes slightly. |
|
Parachutes look like streamers: They come out of the rocket, but they don’t open up. |
The parachutes are likely getting tangled in their own shock cord. Essentially, one part of the parachute might be looped under another, and the string prevents it from opening all the way. As a result, it doesn’t start catching the air yet. |
|
Two parachutes were packed, but it looks like only one deployed! |
One parachute might be getting stuck inside the other. If your current packing mechanism is that one parachute is placed on top of the other, change to something so that the both of the parachutes are folded and placed next to each other vertically. Also, attempt to space out the parachutes through the body tube so that they don’t run the risk of interaction. |
|
Parachute deployed to a shorter length than the shock cord |
The shock cord is likely winding around something jutting out inside the rocket, and thus not pulling out all the way. It could be stuck on a screw from a rail button, for example. To fix this, sand down that jutting down part. |
|
Spillhole keeps getting larger |
If you cut your own spillhole, it’s likely that the edges of the spillhole are fraying and being pulled away from the parachute. To fix this, practice cutting spillholes in a plastic bag to get better, more precise spillholes that will be more effective. |
|
Shock cord snapped and parachute was sent adrift |
There are a few likely causes. First, there might not be any elastic shock cord in the rocket. This should be added, because the elastic is necessary for the impact of deployment to express itself (stretching out the shock cord) without damaging the shock cord. Second, the elastic shock cord might have been worn-out. Generally, the estimate is that after about 5 - 7 flights, shock cord begins to atrophy. We can normally get about 15 flights in before our shock cord starts to tear, so that’s a good estimate for when you must replace the elastic shock cord. Third, the parachute might be having too much drag for the rocket to contend with. The rocket might be moving down too fast, and the parachute is creating enough drag that there is too much tension in the shock cord and it snaps. This can be fixed by packing the parachute into a deployment bag so that it opens more slowly. Or you can pack the parachute so it doesn’t open so fast by using different folding and stowing techniques or by reducing the delay if the delay is very late. A short or a long delay could result in the the rocket moving too fast. |
|
Parachute detached, but it doesn’t look like the shock cord snapped. |
Did you really attach the chute to the rocket? The knots on your parachutes might be coming loose. Check them each time before a launch. Use more knots, for example. Or, rather than using solely square knots to attach a shock cord to the parachute shroud lines, try out a slip knot, or a bowline knot to make a loop that is more easily attached to the parachute, so the strain is on the cord (with a higher load bearing capacity) instead of the knot. |
Altitudes
Too High
This is rare! (And a good thing most of the time, because it’s easy to make your rocket go lower instead of higher.)
Generally, factors outside one’s control besides the weather or slight changes in motor construction won’t really make your rocket go higher, because that would require additional thrust or lighter weights, both of which don’t happen to rockets often.
If your rocket suddenly gets lighter, there may have been an issue with setting it up. (Did you forget to put in an egg? How about your altimeter?) Thus, most of the time, too-high altitudes come from human error.
If consistent, just adding mass is enough.
Higher flights also occur with warmer temperatures or higher humidity levels. These should again simply be fixed by adding mass. With a higher altitude, since it’s up to you where to place the mass and all, the stability and more is in your control, so this can be fixed easier.
Slightly higher altitudes would be addressed in motor minor variability.
Too Low
The most likely thing to consider is the type of flights you’re having. If you can clearly see the parabolic flights mentioned at the start of this document, then that’s the reason for the lack of altitude. Rather than the thrust of the motor causing an increased height, the motor pushes the rocket slightly horizontally as well, and so by trigonometry, the maximum altitude becomes instead of . Since has bounds 0 and 1, this will cause the overall height to decrease. Theta is the angle of incline of the rocket. If this is the case, revisit parabola flights. Generally, these will keep occurring for some reason, even down to weather; so if the parabola flights are the reason you aren’t getting the altitude you want and they happen often, you should simply modify your rocket keeping the parabola in mind rather than waiting to launch in the perfect conditions.
Another potential issue with your rocket going too low is that it’s having issues with stability. Zigzag flights as well lose altitude, because there is a huge increase in drag when the rocket oscillates back and forth.
This might also occur due to the state of your launch lugs (or rail guides) on the rocket. Are they aligned? It may help to switch to rail buttons on the next rocket. clean the rod well with a baby wipe/something to dissolve the grime. An alternate solution is just getting a new rod; in this case, getting a longer rod is helpful for stability issues and should be considered.
If it’s a common event (regardless of launch conditions), try:
- Changing one’s motor.
- Airfoiling one’s fins - this can better split the air molecules as it goes up in a sense and will launch the rocket higher.
If the lower apogee occurs on certain days rather than others, it might be due to the weather as well. This is similar to altitudes being higher than others. Cooler temperatures will result higher air density,
Crazy changes in altitude (such as rocket going just barely off the rod and then falling, or doing a loop-de-loop, etc.) are also generally due to motor construction. Have someone else watch as motors are built, or open the instruction manual again to do it. Be sure that the thinnest O-ring is in front of the flat disk for Aerotech rockets as well.
Minor Variability
If the propellant mass is the same (and the black powder mass is not varying at all as well), then the reason for this is likely just human error. An increase in tape for the egg carrier wrapping, or potentially decreased mass from un-doing reefing and removing tape, or less mass from a slightly larger spillhole can all affect the rocket’s flight. These can simply be fixed by adding/removing mass. If the rocket is already as light as can be with the rocket design, airfoiling the fins or sanding them slightly down to make a more aerodynamic rocket can help as well.
Unchanging
That’s really great! It implies that your rocket is going to the same altitude every time and is reliable.
Tests
CP & CG Test
Shaking Test
- Shake the part of the rocket attached to the coupler or transition up and down a few times. The coupler should come out slightly, so that more of it can be seen. If shaken even harder, the coupler should come out the rest of the way.
Wind Test
- Many things could suffice for this - the optimal instrument is an anemometer. However, for simply determining the direction of the wind, using a flag or even one’s hair could work. Then, tilt the rod in the direction that the wind is blowing. This can be used to measure weather when launching.
Solutions
Airfoiling fins
This creates more lift, by Bernoulli’s principle. By airfoiling the fins, you’re lowering drag and increasing the restoring force so the rocket reacts quicker to disturbances.
Increase Rod Length
With a larger flight rod, the motor has more time to burn in a straight path. Wind won’t alter the direction of velocity to the extent it will at the start, and the motor will push the rocket upwards perpendicular to the ground, and thus this will decrease the parabolic nature of the flight and create a straight flight.
General Tips and Tricks
- Glue fins carefully. Sometimes, an issue with the fins is that their tabs are too short, so it’s impossible to make them stick to the motor tube. See the video at https://www.apogeerockets.com/Advanced_Construction_Videos/Rocketry_Video_351 to fix this issue.If the fin rests diagonally on the motor tube, it might be due to the shock cord’s presence on the motor tube which might prevent the fin from resting all the way, resulting in only two contact points between the fin and the inner tube: on the shock cord and the back of the tube. Instead, sand the part of the fin tab where the shock cord is so the bottom looks something like a stair. Then, the longer part (before the stair) will rest on the inner tube and the stair will sit atop the shock cord.
- Re-use parts from old rockets. Rail buttons or launch lugs are re-usable, as are parachutes, fire blankets, shock cord, nose cones, and more.
- If the motor is not fitting into your inner tube, then sand the inside of the inner tube, as it’s likely that the tube was slightly crumpled or tilted in such a way that the motors can’t fit inside. Sanding it down will let the motor go up.
- Mass every part of the rocket individually to see if any of them are changing and to better identify the cause.
- If the part of your rocket with a lower diameter than the other half also has rail buttons or launch lugs attached, the rocket won’t slide onto the rod because the other half of the rocket prevents it. In that case, use longer screws, and then you can stack the black rail button pieces atop each other to extend the rail buttons far enough away from the body of the rocket to make the rocket fly. These black rail buttons can be harvested from a previous rocket.
- Use launch lugs if you can. They - when popping off - won’t render you unable to fly because of the rail button needing to be installed during the inner tube installation, and their positioning can be modified easier. They are also more sturdy than the thinner, smaller rail buttons.
- When inserting the Kevlar fire blanket, change the location of the hole through which the shock cords go through. If this hole is in the middle of the fire blanket, it will become much harder to position it such that the fire blanket is completely in front of the inner tube and blocking the motor completely, since the shock cord also comes from the inner tube. Instead, by placing the fire blanket hole that the shock cord comes through on the edge of the fire blanket, it’s easier to cover the inner tube motor hole completely.
- When 3-D printing your fins, always increase up the fin tab length by 0.1 cm. It won’t take long to sand away, and because softwares like RockSim/OpenRocket often truncate or round the length, a desired 2.34 cm tab length might actually come out as a 2.3 cm tab length, which would be shorter than desired.
- Use quality centering rings that fit nicely in your body tube so that they are less likely to break from thrust, and so that they have more points of contact with the outer rocket diameter.
- Build an altimeter sled: it will ensure that the altimeter doesn’t move around too much. This isn’t necessary, but it is helpful! If no time, though, just taping the altimeter to the transition works too.
- If the motor you are using may not be the best for your rocket because the apogee on RockSim/OpenRocket or elsewhere isn’t the ideal, use a bigger (29 mm) inner tube in the actual rocket. Then, if using a 24 mm motor, build a motor adapter like an altimeter sled that goes from a 24 mm inner diameter to a 29 mm outer diameter and slide this into the back of the rocket as well.
- Leave the foam nose cone un-spray painted. The paint on a foam nose cone will simply add mass; and it generally cracks and peels off and leaves the front of the nose cone irregularly shaped and slightly damaged.
- Tape the nose cone on. If the nose cone pops off, teams run the risk of disqualification in TARC, and it doesn’t add much mass to the rocket. Also, generally don’t use electrical tape for this because when peeling off the tape, the nose cone generally loses foam that sticks to the tape.
- Launch equipment sometimes fails. If there’s no continuity but the igniter clips are placed correctly, it’s likely that the wire has been fraying. To fix this issue relatively quickly (without a soldering iron, since people don’t often have soldering irons when launching in the field), strip the wire using a pair of scissors or an exacto knife. Push the copper tips through the hole in the igniter clasp and pull them over the end to form a knot to better establish the connection. Wrap entirely with electrical tape.
- Use a launch rod standoff to prevent the rocket’s igniter wires from shorting or touching each other.
- Pennies are a good mass item as they’re heavy (averaging 2.5 grams) and they fit perfectly in the hole at the top of the nose cone.
- Video-tape launches! Even if you miss something when launching, the video won’t.
- Mass objects in real life and compare them to simulated masses - for example, the weight of epoxy or or a potential mistake in typing up masses could cause the mass of the rocket to not be the same as the mass in a simulator.
- The rocket liftoff velocity must be greater than 35 mph for it to be safe.
- Treed rockets are common; deal with this by placing the rod for launch location in the part of a launching field farthest from the direction of the wind. When the rocket is descending, it’s likely to move with the wind and thus into the edges of the launching field, which might be marked with trees or other natural barriers that can catch your rocket and hurt it.Once your rocket is treed, however, there are a few things you can do. Generally, we use a long pole to try and hook the shock cord around and then pull it down. Climbing up into the trees and shaking the branches can also help. If the fin can of the rocket is low enough to grab and the rocket is stuck because of the shock cord, untie the shock cord and get the fin can down safely and deal with the other (less hard to make) half falling out of the tree.
- When cutting plastic transitions, the fastest and cleanest way is to use a razor saw or hack-saw. Clean up the edges with sandpaper.
- In regards to ordering parts, order everything in advance, as parts arrival time can take a while and that shouldn’t be a hindrance to rocket creation.
- Painting a rocket and letting it dry in such a way that the paint doesn’t drip onto one half of the rocket more than the other (because the rocket is tilted on its pitch axis) can be done in a variety of ways.
Authored By Nishka
Nishka has been doing rocketry for six years, leading her team to nationals for most of them. However, her love of the sky has been present since she was a child. One of her favorite parts of rocketry is the math and physics behind it, from torque to Barrowman's equations. She enjoys diagnosing problems in the rocket (and fixing them!) as well as implementing cool new ideas into the design. Outside of rocketry, she participates in competitive math and coding. In her free time, Nishka bothers her younger sister, writes novels, and hikes often.


1 comment